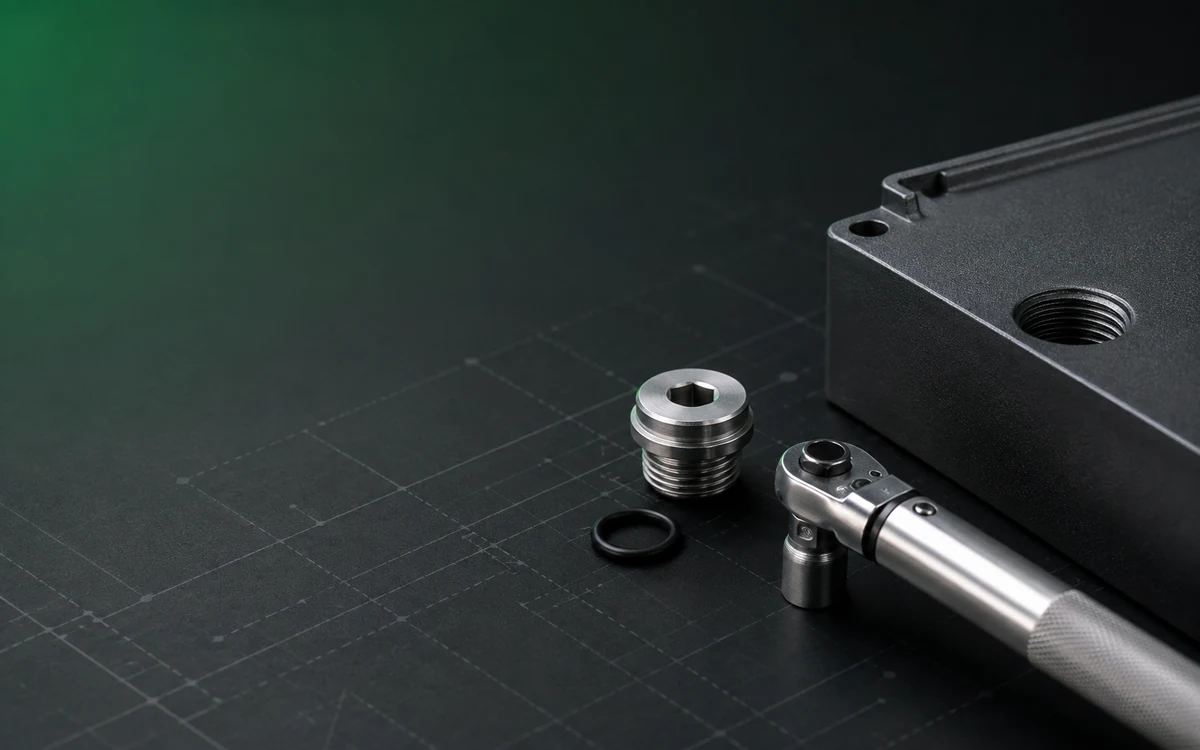
# 安全安裝旋入式透氣塞有哪些關鍵扭力規格？

> Source: https://chinacableglands.com/zh-hant/blog/what-are-the-critical-torque-specifications-for-installing-screw-in-vent-plugs-safely/
> Language: zh-Hant
> Publisher: 倍拓電纜接頭
> Author: Leo Xu
> Published: 2026-03-09
> Updated: 2026-10-29

依密封件、引入口、摩擦狀態與工具設定旋入式透氣塞扭矩。完成單位換算與偏移轉接頭計算，並掌握實際停止條件。

<p><strong>旋入式透氣塞安裝扭矩</strong>是透氣塞最後鎖緊步驟指定的轉動力矩。設定工具前，我會先確認該數值適用於確切的透氣塞、配合引入口、密封件及表面處理狀態。實際目標是讓密封件就位並固定透氣塞，同時避免螺紋滑牙、本體變形或通氣路徑堵塞。</p>
<blockquote>
<p><strong>重點摘要</strong></p>
<ul>
<li>查閱適用於完整透氣塞型號及其配合引入口的扭矩或鎖合說明。</li>
<li>確認密封件的承靠位置，以及螺紋是否有足夠的有效深度讓其到達該位置。</li>
<li>維持指定的乾燥、潤滑或出廠處理狀態。</li>
<li>確認工具的單位、工作範圍及轉接頭配置符合說明。</li>
<li>若過早卡滯、意外頂底、密封件擠出、工具打滑或相鄰接合處移動，請停止操作。</li>
</ul>
</blockquote>
<h2 id="find-the-value-for-the-joint-you-are-tightening">找出適用於目前接合處的扭矩值</h2>
<p><strong>鎖緊規格</strong>會將目標值或範圍與明確的組件及方法綁定。查看數值旁是否標明完整料號、密封件、配合材料、表面準備狀態與安裝步驟。薄壁聚合物本體的透氣塞與金屬六角本體的透氣塞，即使使用相同的公稱螺紋，承受載荷的部位仍可能不同。</p>
<p>我會先確認應該轉動哪個零件。外殼側螺紋的數值適用於該接合處；可拆卸端蓋或膜片承載件可能有自己的方法。如果說明採用轉數、最終位置或肩部就位作為條件，我會遵循該鎖合規則。它描述了該設計如何達到預期狀態。</p>
<p><a href="/zh-hant/blog/whats-the-perfect-torque-value-for-cable-glands-and-how-tight-is-too-tight/">電纜密封接頭扭力指南</a>也說明了密封接頭不同鎖緊步驟的區別。安裝透氣塞時，請在現行安裝文件或圖面中查找指定值。若未列出，請在安裝前向供應商確認型號與配合引入口的組合。通用螺栓表描述的是不同的載荷路徑，不適合作為選擇透氣塞設定值的依據。</p>
<table>
<thead>
<tr>
<th>配對項目</th>
<th>透氣塞與外殼的檢查項目</th>
<th>對鎖緊的影響</th>
</tr>
</thead>
<tbody>
<tr>
<td>透氣塞與驅動部位</td>
<td>完整型號、材料、版本，以及扳手平面或驅動凹槽</td>
<td>驅動部位與本體必須能承受鎖緊載荷。</td>
</tr>
<tr>
<td>配合螺紋</td>
<td>螺紋系列、螺距或錐度、有效深度與材料</td>
<td>配合螺紋應能順利旋合並支撐最終接合狀態。</td>
</tr>
<tr>
<td>密封件與承靠面</td>
<td>O 形環、墊圈、肩部或螺紋密封配置</td>
<td>密封件需要預定的接觸表面與鎖合狀態。</td>
</tr>
<tr>
<td>表面準備</td>
<td>乾燥狀態，或指定的處理材料與施用方法</td>
<td>摩擦會改變施加扭矩如何轉化為介面載荷。</td>
</tr>
<tr>
<td>工具配置</td>
<td>量程、單位、方向、驅動部位、轉接頭與反向固定方式</td>
<td>工具配置決定顯示的扭矩如何傳遞至透氣塞。</td>
</tr>
<tr>
<td>終止條件</td>
<td>扭矩、位置或移動標準，以及最終檢查</td>
<td>組裝後的就位狀態必須符合指定結果。</td>
</tr>
</tbody>
</table>
<h2 id="check-the-seal-seat-and-thread-depth">檢查密封承靠面與螺紋深度</h2>
<p><strong>端面密封</strong>會在透氣塞凸緣與外殼承靠面之間封住介面。螺紋提供力量，使這些表面彼此貼合。錐螺紋設計可能改由螺紋干涉提供固定或密封效果。肩部或受限位的密封件也可能在載荷路徑中形成另一個止擋。</p>
<p>我會查看剖面圖，確認哪個部位會先接觸。若凸緣下方使用 O 形環，請檢查承靠面是否有毛刺、漆層凸起或可能切傷 O 形環、造成洩漏路徑的損壞。若採用螺紋密封設計，請遵循指定的旋合長度及表面處理方式。<a href="/zh-hant/blog/why-is-entry-thread-sealing-critical-and-should-you-choose-o-rings-or-washers/">引入口螺紋密封指南</a>說明了這些不同介面。</p>
<p>盲孔引入口另有深度限制。如果透氣塞前端在密封件接觸承靠面之前就先頂到底，扭矩就會因抵住孔底而升高；再增加扭矩，載荷便會施加在錯誤的表面。比較透氣塞在預定就位位置的突出長度與可用深度，並將密封件及任何肩部納入考量。最終配合時，請依圖面上的旋合長度與間隙限制確認。</p>
<p><a href="/zh-hant/blog/what-does-m20-cable-gland-actually-mean-a-spec-breakdown/">M20 引入口規格解析</a>說明了公稱螺紋標記背後的尺寸。我會一併檢查螺距、有效長度及直徑，尤其是替換件外觀與拆下的透氣塞相似時。</p>
<figure class="blog-chart" style="container-type: inline-size;">
<svg xmlns="http://www.w3.org/2000/svg" viewBox="0 0 480 1028" role="img" aria-labelledby="vent-torque-title vent-torque-desc" style="font-family:var(--font-body);max-width:520px;margin-inline:auto; width: 100% !important; max-width: 100% !important; height: auto !important;" id="cg-typography-a43a413035b9b647">
<style>
#cg-typography-a43a413035b9b647 { --svg-body-screen: 17px; }
@media (max-width: 760px) { #cg-typography-a43a413035b9b647 { --svg-body-screen: 16px; } }
</style>
<title id="vent-torque-title">界定旋入式透氣塞扭力說明的四項控制因素</title>
<desc id="vent-torque-desc">窄幅縱向流程連接確切產品識別、隱藏的螺紋與密封介面、準備與摩擦狀態，以及指定數值與工具方法。第二項控制因素內分列端面密封與螺紋密封路徑。最下方區塊將四項因素合併為一項完整說明。</desc>
<defs>
<marker id="vent-torque-arrow" markerWidth="10" markerHeight="10" refX="9" refY="5" orient="auto" markerUnits="userSpaceOnUse">
<path d="M0 0L10 5L0 10Z" fill="var(--color-primary)"/>
</marker>
</defs>
<text x="240" y="42" text-anchor="middle" fill="var(--color-carbon)" font-size="27" font-weight="700" style="font-size: calc(22px * 480px / 100cqw) !important;">扭力值只有在</text>
<text x="240" y="76" text-anchor="middle" fill="var(--color-carbon)" font-size="27" font-weight="700" style="font-size: calc(22px * 480px / 100cqw) !important;">四項控制條件皆符合時才有效</text>
<rect x="28" y="104" width="424" height="132" rx="16" fill="var(--surface-card)" stroke="var(--color-primary)" stroke-width="3"/>
<text x="54" y="143" fill="var(--color-carbon)" font-size="22" font-weight="700" style="font-size: calc(18px * 480px / 100cqw) !important;">1 確切透氣塞識別資料</text>
<text x="54" y="180" fill="var(--color-carbon)" font-size="18.5" style="font-size: calc(var(--svg-body-screen) * 480px / 100cqw) !important;">型號、尺寸、材料與版本</text>
<text x="54" y="210" fill="var(--color-carbon)" font-size="18.5" style="font-size: calc(var(--svg-body-screen) * 480px / 100cqw) !important;">及說明書修訂版次</text>
<line x1="240" y1="236" x2="240" y2="270" stroke="var(--color-primary)" stroke-width="4" marker-end="url(#vent-torque-arrow)"/>
<rect x="28" y="284" width="424" height="190" rx="16" fill="var(--surface-card)" stroke="var(--color-cloud)" stroke-width="3"/>
<text x="54" y="324" fill="var(--color-carbon)" font-size="22" font-weight="700" style="font-size: calc(18px * 480px / 100cqw) !important;">2 螺紋與密封介面</text>
<rect x="52" y="348" width="376" height="48" rx="10" fill="var(--color-ash)" stroke="var(--color-cloud)" stroke-width="2"/>
<text x="240" y="379" text-anchor="middle" fill="var(--color-carbon)" font-size="18.5" style="font-size: calc(16px * 480px / 100cqw) !important;">端面密封或肩部</text>
<rect x="52" y="410" width="376" height="48" rx="10" fill="var(--color-ash)" stroke="var(--color-cloud)" stroke-width="2"/>
<text x="240" y="441" text-anchor="middle" fill="var(--color-carbon)" font-size="18.5" style="font-size: calc(var(--svg-body-screen) * 480px / 100cqw) !important;">錐螺紋或其他螺紋</text>
<line x1="240" y1="474" x2="240" y2="508" stroke="var(--color-primary)" stroke-width="4" marker-end="url(#vent-torque-arrow)"/>
<rect x="28" y="522" width="424" height="138" rx="16" fill="var(--surface-card)" stroke="var(--color-cloud)" stroke-width="3"/>
<text x="54" y="562" fill="var(--color-carbon)" font-size="22" font-weight="700" style="font-size: calc(18px * 480px / 100cqw) !important;">3 表面準備與摩擦</text>
<text x="54" y="597" fill="var(--color-carbon)" font-size="18.5" style="font-size: calc(var(--svg-body-screen) * 480px / 100cqw) !important;">乾燥、潤滑、密封或鎖固狀態</text>
<text x="54" y="626" fill="var(--color-carbon)" font-size="18.5" style="font-size: calc(var(--svg-body-screen) * 480px / 100cqw) !important;">均須符合說明內容</text>
<line x1="240" y1="660" x2="240" y2="694" stroke="var(--color-primary)" stroke-width="4" marker-end="url(#vent-torque-arrow)"/>
<rect x="28" y="708" width="424" height="138" rx="16" fill="var(--surface-card)" stroke="var(--color-primary)" stroke-width="3"/>
<text x="54" y="748" fill="var(--color-carbon)" font-size="22" font-weight="700" style="font-size: calc(18px * 480px / 100cqw) !important;">4 扭矩值與工具方法</text>
<text x="54" y="783" fill="var(--color-carbon)" font-size="18.5" style="font-size: calc(var(--svg-body-screen) * 480px / 100cqw) !important;">單位、工具量程、驅動部位與轉接頭</text>
<text x="54" y="812" fill="var(--color-carbon)" font-size="18.5" style="font-size: calc(var(--svg-body-screen) * 480px / 100cqw) !important;">反力支撐與停止位置</text>
<line x1="240" y1="846" x2="240" y2="880" stroke="var(--color-primary)" stroke-width="4" marker-end="url(#vent-torque-arrow)"/>
<rect x="52" y="894" width="376" height="106" rx="14" fill="var(--color-ash)" stroke="var(--color-primary)" stroke-width="3"/>
<text x="240" y="936" text-anchor="middle" fill="var(--color-carbon)" font-size="22" font-weight="700" style="font-size: calc(18px * 480px / 100cqw) !important;">四項控制條件</text>
<text x="240" y="970" text-anchor="middle" fill="var(--color-carbon)" font-size="22" font-weight="700" style="font-size: calc(18px * 480px / 100cqw) !important;">共同構成一項扭力指示</text>
</svg>
<figcaption>設定安裝扭矩前，先確認透氣塞、密封介面、表面準備及工具方法相互匹配。</figcaption>
</figure>
<h2 id="preserve-the-specified-friction-condition">維持指定的摩擦狀態</h2>
<p><strong>摩擦狀態</strong>是鎖緊時接觸表面的乾燥、潤滑、塗覆或密封狀況。施加的轉動力有一部分用來克服摩擦，剩餘部分則帶動移動並使接合處承受載荷。因此，即使工具設定相同，只要表面狀態改變，最終載荷也可能不同。</p>
<p>除非安裝文件要求移除，否則我會保留出廠處理層。若要另加機油、防咬合劑、膠帶、密封劑或螺紋固定劑，請使用指定的材料及施用方法。用於潤滑螺紋的產品，對彈性體或膜片可能產生不同影響。請勿讓材料進入通氣路徑，並遵守設備恢復運作前的任何固化要求。</p>
<p>請使用與外殼、膜片及密封件相容的方法清潔引入口，並清除鬆散的切屑與碎屑。檢查 O 形環或墊圈是否有切口、扭曲、膨脹、壓扁或移位；若產品狀況或重用標準要求，請更換零件。</p>
<figure>
<picture>
<source media="(max-width: 640px)" srcset="/images/blog/what-are-the-critical-torque-specifications-for-installing-screw-in-vent-plugs-safely/entry-land-and-seal-precheck-600.webp 600w" type="image/webp">
<img alt="技術人員擦拭空的螺紋外殼開口，手持帶黑色 O 形環的銀色穿孔透氣塞" src="/images/blog/what-are-the-critical-torque-specifications-for-installing-screw-in-vent-plugs-safely/entry-land-and-seal-precheck.webp" width="1200" height="800" loading="lazy" decoding="async">
</picture>
<figcaption>技術人員擦拭螺紋開口，並手持可見 O 形環的透氣塞，準備將其裝入外殼。</figcaption>
</figure>
<p>NASA 的 <a href="https://standards.nasa.gov/sites/default/files/standards/MSFC/B/0/MSFC-STD-486-B.pdf">MSFC-STD-486-B，第 4.4–4.5 節</a>，將其螺紋緊固件應用中的潤滑材料與安裝方法細節連結至圖面。其<a href="https://standards.nasa.gov/standard/MSFC/MSFC-STD-486">官方範圍</a>是太空載具及支援設備。安裝透氣塞時，請採用製造商指定的處理方式與扭矩值；NASA 的緊固件扭矩表不適用於此用途。</p>
<h2 id="choose-the-unit-tool-range-and-adaptor-together">一併選擇單位、工具量程與轉接頭</h2>
<p>閱讀數值及方法後，我才選擇工具。請確認指定方向的工作範圍、解析度與校正狀態，再安裝能完全咬合透氣塞的驅動部位。即使套筒尺寸吻合，大型工場用扭力扳手也可能不適合小型透氣塞。</p>
<p>例如，假設安裝文件指定 2.00 N·m。這個數值落在第一把工具標示的 0.5–5 N·m 範圍內，但低於第二把工具的 20–100 N·m 範圍。確認準確度、驅動部位及方法後，第一把工具仍可列入考慮；第二把則超出其標示範圍。工具容量與套筒尺寸回答的是不同問題。</p>
<figure>
<img alt="扭力扳手、套筒、旋入式透氣塞、O 形環及螺紋外殼試件，排列成受控安裝配置" src="/images/blog/what-are-the-critical-torque-specifications-for-installing-screw-in-vent-plugs-safely/vent-plug-torque-tool-setup.webp" srcset="/images/blog/what-are-the-critical-torque-specifications-for-installing-screw-in-vent-plugs-safely/vent-plug-torque-tool-setup-600.webp 600w, /images/blog/what-are-the-critical-torque-specifications-for-installing-screw-in-vent-plugs-safely/vent-plug-torque-tool-setup.webp 1200w" sizes="(max-width: 680px) 100vw, 760px" width="1200" height="750" loading="lazy" decoding="async">
<figcaption>透氣塞與 O 形環擺在螺紋外殼引入口和扭力扳手旁，指出手動旋入及最後鎖緊前須配對核對的零件。</figcaption>
</figure>
<h3 id="worked-example-convert-the-stated-torque">計算示例：換算指定扭矩</h3>
<p>假設某安裝文件為特定組件指定 <strong>2.00 N·m</strong>。此處數值僅為示例，並非透氣塞建議值。<a href="https://www.nist.gov/pml/special-publication-811/nist-guide-si-appendix-b-conversion-factors/nist-guide-si-appendix-b9">NIST 扭矩換算表</a>列出每 lbf·in 約等於 0.1129848 N·m，每 lbf·ft 約等於 1.355818 N·m。</p>
<table>
<thead>
<tr>
<th>工具上的單位</th>
<th>以 2.00 N·m 計算</th>
<th>換算結果（三位有效數字）</th>
</tr>
</thead>
<tbody>
<tr>
<td>N·cm</td>
<td>2.00 × 100</td>
<td>200 N·cm</td>
</tr>
<tr>
<td>lbf·in</td>
<td>2.00 ÷ 0.1129848</td>
<td>17.7 lbf·in</td>
</tr>
<tr>
<td>lbf·ft</td>
<td>2.00 ÷ 1.355818</td>
<td>1.48 lbf·ft</td>
</tr>
</tbody>
</table>
<p>我會先確認刻度盤上的單位，再設定換算結果。英寸磅與英尺磅相差 12 倍：若在 lbf·ft 刻度上輸入 17.7，實際施加的扭矩約為 24.0 N·m。請依工具及安裝方法允許的設定值與捨入方式操作；計算器顯示更多位數，不會提高工具解析度。</p>
<p><a class="article-tool-card article-tool-card-link" href="/zh-hant/resource-center/tools/torque-unit-converter/" aria-label="電纜密封接頭扭矩單位轉換器 計算器"><span class="article-tool-card-index">工具</span><span class="article-tool-card-kicker">機械載荷</span><strong class="article-tool-card-title">電纜密封接頭扭矩單位轉換器</strong><span class="article-tool-card-copy">在計算器中輸入安裝文件上的數值與單位，即可讀取適用於扭矩工具的換算值。使用換算後的設定前，請確認工具的工作範圍與捨入方式。</span><span class="article-tool-card-formula">TN·m = Tinput × unit conversion factor</span><span class="article-tool-card-inputs" aria-label="計算器輸入項目"><em>扭矩值</em><em>輸入扭矩單位</em></span><span class="article-tool-card-action">開啟計算器 <span aria-hidden="true">-&gt;</span></span></a></p><h3 id="worked-example-an-inline-offset-changes-the-lever-arm">計算示例：線性偏移轉接頭會改變力臂</h3>
<p><strong>偏移轉接頭</strong>會使透氣塞軸線偏離扳手驅動軸線。如果它沿扳手方向直線延伸，手部施力在透氣塞處會作用於更長的距離。NASA 第 4.2.2 節要求在其緊固件程序中校正扳手與轉接頭組合，或採用可接受的解析修正。安裝透氣塞時，請遵循工具供應商的修正方法，並確認有效尺寸及施力位置。</p>
<p>假設有一個剛性配置，其扳手有效長度為 250 mm，並在前端直接延伸 50 mm 的轉接頭。拉力在指定施力位置垂直於握柄。透氣塞目標值同樣假設為 2.00 N·m。在此幾何配置下：</p>
<div class="article-math article-math-display" data-latex="T_{\mathrm{setting}}=T_{\mathrm{plug}}\frac{L}{L+A}
=2.00\frac{250}{250+50}\approx1.67\ \mathrm{N\cdot m}"><span class="katex"><math xmlns="http://www.w3.org/1998/Math/MathML" display="block"><semantics><mrow><msub><mi>T</mi><mrow><mi mathvariant="normal">s</mi><mi mathvariant="normal">e</mi><mi mathvariant="normal">t</mi><mi mathvariant="normal">t</mi><mi mathvariant="normal">i</mi><mi mathvariant="normal">n</mi><mi mathvariant="normal">g</mi></mrow></msub><mo>=</mo><msub><mi>T</mi><mrow><mi mathvariant="normal">p</mi><mi mathvariant="normal">l</mi><mi mathvariant="normal">u</mi><mi mathvariant="normal">g</mi></mrow></msub><mfrac><mi>L</mi><mrow><mi>L</mi><mo>+</mo><mi>A</mi></mrow></mfrac><mo>=</mo><mn>2.00</mn><mfrac><mn>250</mn><mrow><mn>250</mn><mo>+</mo><mn>50</mn></mrow></mfrac><mo>≈</mo><mn>1.67</mn><mtext> </mtext><mrow><mi mathvariant="normal">N</mi><mo>⋅</mo><mi mathvariant="normal">m</mi></mrow></mrow><annotation encoding="application/x-tex">T_{\mathrm{setting}}=T_{\mathrm{plug}}\frac{L}{L+A}
=2.00\frac{250}{250+50}\approx1.67\ \mathrm{N\cdot m}</annotation></semantics></math></span></div>
<p>此處，<span class="article-math article-math-inline" data-latex="L"><span class="katex"><math xmlns="http://www.w3.org/1998/Math/MathML"><semantics><mrow><mi>L</mi></mrow><annotation encoding="application/x-tex">L</annotation></semantics></math></span></span> 是扳手有效長度，<span class="article-math article-math-inline" data-latex="A"><span class="katex"><math xmlns="http://www.w3.org/1998/Math/MathML"><semantics><mrow><mi>A</mi></mrow><annotation encoding="application/x-tex">A</annotation></semantics></math></span></span> 是以相同長度單位表示的線性偏移量。此關係來自同一手部施力分別作用於距離 <span class="article-math article-math-inline" data-latex="L"><span class="katex"><math xmlns="http://www.w3.org/1998/Math/MathML"><semantics><mrow><mi>L</mi></mrow><annotation encoding="application/x-tex">L</annotation></semantics></math></span></span> 及 <span class="article-math article-math-inline" data-latex="L+A"><span class="katex"><math xmlns="http://www.w3.org/1998/Math/MathML"><semantics><mrow><mi>L</mi><mo>+</mo><mi>A</mi></mrow><annotation encoding="application/x-tex">L+A</annotation></semantics></math></span></span>。若扳手仍設定為 2.00 N·m，在此理想化配置中，透氣塞處的扭矩會是 <span class="article-math article-math-inline" data-latex="{2.00}\times300/250=2.40"><span class="katex"><math xmlns="http://www.w3.org/1998/Math/MathML"><semantics><mrow><mn>2.00</mn><mo>×</mo><mn>300</mn><mi mathvariant="normal">/</mi><mn>250</mn><mo>=</mo><mn>2.40</mn></mrow><annotation encoding="application/x-tex">{2.00}\times300/250=2.40</annotation></semantics></math></span></span> N·m，增加 20%。</p>
<p>套用此關係前，我會先確認轉接頭的方向。它適用於上述直線延伸及垂直拉力；轉接頭角度或施力位置不同，幾何關係也會改變。沿驅動軸線使用套筒延長桿，也不同於此示例中的線性偏移。</p>
<p>在這些假設示例中，單位錯誤造成的偏差大得多：約為 24.0 N·m；未修正的線性偏移轉接頭則會造成 2.40 N·m。我會先核對刻度單位，再確認轉接頭及施力位置。兩項檢查都應在鎖緊透氣塞前完成。</p>
<h2 id="tighten-smoothly-and-inspect-the-seated-assembly">平穩鎖緊並檢查就位組件</h2>
<p><strong>手動旋入</strong>是最終使用工具鎖緊前的初始螺紋接合步驟，用來將透氣塞對準引入口。我會讓透氣塞保持正向，再確認旋入是否順暢。若過早卡滯，應檢查配合狀況，而不是改用更長的握柄。</p>
<ol>
<li>依安全作業程序隔離設備並做好準備。</li>
<li>依安裝文件核對透氣塞、密封件、引入口、表面狀態與工具。</li>
<li>先用手旋入螺紋。若有晃動、卡滯、未對準或間隙異常，請停止。</li>
<li>將工具完全套入預定的驅動部位；如有要求，反向固定指定零件。</li>
<li>平穩施加最終扭矩。使用跳脫式工具時，收到有效提示即停止；只有安裝方法有要求時才採用其他順序。</li>
<li>檢查凸緣或肩部位置、密封件位置、透氣塞本體及周圍引入口是否損壞或移動。</li>
<li>執行指定功能檢查前，先檢查內外通氣間隙是否暢通。</li>
</ol>
<figure>
<picture>
<source media="(max-width: 640px)" srcset="/images/blog/what-are-the-critical-torque-specifications-for-installing-screw-in-vent-plugs-safely/manual-torque-driver-engagement-600.webp 600w" type="image/webp">
<img alt="技術人員穩固灰色外殼，並將手動起子與側壁小型透氣接頭對正" src="/images/blog/what-are-the-critical-torque-specifications-for-installing-screw-in-vent-plugs-safely/manual-torque-driver-engagement.webp" width="1200" height="800" loading="lazy" decoding="async">
</picture>
<figcaption>一隻手穩住外殼，另一隻手將手動起子垂直對準側壁接頭。</figcaption>
</figure>
<p><strong>計量追溯性</strong>透過有文件記錄、且每一環節均納入不確定度的校正鏈，將測量結果連結至參考標準。<a href="https://www.nist.gov/metrology/metrological-traceability">NIST 政策與常見問答</a>也說明，追溯性必須搭配適合該工作的測量不確定度。我會檢查工具在此鎖緊步驟中的可用範圍、狀況及校正涵蓋範圍。只有有效標籤，並不能證明工具可解析所需設定值。</p>
<p>扳手掉落、驅動部位損壞或套筒打滑，都必須先處理，才能繼續使用。反覆聽到跳脫聲也不能作為完成確認：若接合處再次移動，密封件與螺紋會承受更多載荷。請依指定方法檢查或複查完成後的接合處。較完整的<a href="/zh-hant/blog/what-are-the-critical-dos-and-donts-that-make-or-break-cable-gland-installation-success/">安裝指南</a>涵蓋電纜引入五金的準備及操作空間。</p>
<h2 id="respond-to-binding-bottoming-or-excess-torque">處理卡滯、頂底或扭矩過大的情況</h2>
<p><strong>扭力超限事件</strong>是指鎖緊時超過組件規定的扭矩上限。受位置控制的設計也可能因移動或鎖合過度而損壞。只要出現接合處正在抵住錯誤表面或工具失去控制的跡象，我就會立即停止。</p>
<table>
<thead>
<tr>
<th>發現狀況</th>
<th>可能原因</th>
<th>後續處置</th>
</tr>
</thead>
<tbody>
<tr>
<td>旋入前幾圈即卡滯</td>
<td>螺距錯誤、螺紋錯牙、碎屑或螺紋損壞</td>
<td>依安全程序旋出，並檢查兩側螺紋。</td>
</tr>
<tr>
<td>密封件翻滾、擠出或脫離溝槽</td>
<td>未對準、承靠面損壞、密封件錯誤或鎖合過度</td>
<td>檢查承靠面，並裝上指定的替換密封件或透氣塞。</td>
</tr>
<tr>
<td>凸緣或肩部就位前，前端已頂到底</td>
<td>深度不足、有異物阻擋或透氣塞長度錯誤</td>
<td>依圖面比較有效深度與就位後的突出長度。</td>
</tr>
<tr>
<td>扳手平面被磨圓、工具打滑或本體變形</td>
<td>驅動部位咬合不良或載荷過大</td>
<td>停止作業，移除有問題的工具配置並評估受影響零件。</td>
</tr>
<tr>
<td>超過指定扭矩</td>
<td>螺紋、本體、密封件或引入口可能受損</td>
<td>遵循製造商的檢查與更換程序。</td>
</tr>
<tr>
<td>外殼轉接頭或相鄰接合處跟著轉動</td>
<td>反向固定不足或載荷傳遞至其他部位</td>
<td>檢查並恢復所有受到影響的接合處。</td>
</tr>
</tbody>
</table>
<p>鬆開過度鎖緊的透氣塞只能釋放載荷，無法修復滑牙、切傷的密封件或永久變形的本體。我會依拆卸程序檢查透氣塞、密封件、承靠面及配合螺紋，再依產品標準決定更換或重用。降低第二次的設定值無法修復已受損的零件。</p>
<h2 id="leave-the-vent-path-clear">保持通氣路徑暢通</h2>
<p>鎖緊後，我會檢查透氣面及內部間隙是否有污垢、油漆、標籤、密封劑或工具造成的損傷。確認方向符合要求，並讓附近電纜或絕緣材料避開氣流路徑。<a href="/zh-hant/blog/how-do-breathing-drainage-glands-prevent-condensation-in-electrical-enclosures/">透氣與排水指南</a>說明壓力平衡與排水各自的作用。</p>
<figure>
<picture>
<source media="(max-width: 640px)" srcset="/images/blog/what-are-the-critical-torque-specifications-for-installing-screw-in-vent-plugs-safely/installed-vent-face-inspection-600.webp 600w" type="image/webp">
<img alt="技術人員用手電筒照亮戶外外殼上已安裝的穿孔金屬透氣面；其下方另有黑色電纜引入口" src="/images/blog/what-are-the-critical-torque-specifications-for-installing-screw-in-vent-plugs-safely/installed-vent-face-inspection.webp" width="1200" height="800" loading="lazy" decoding="async">
</picture>
<figcaption>手電筒照亮已安裝的透氣面；電纜則從下方的獨立接頭及壁面夾具穿入。</figcaption>
</figure>
<p>依已安裝的配置執行指定的氣流、排水或外殼測試。扭矩控制機械接合；這些檢查則確認透氣功能及外殼防護狀態。若檢查未通過，請先檢查阻塞物、密封件及安裝狀況，再調整鎖緊配置。</p>
<p>檢查及任何重新鎖緊作業都應遵循設備維護說明。拆卸、撞擊、洩漏、重新塗漆或引入口變更都可能改變承靠面或通氣路徑；完成這些作業後，請檢查受影響部位。</p>
<h2 id="conclusion">結語</h2>
<p>設定旋入式透氣塞時，我會依產品說明核對實際密封件、配合螺紋、表面狀態及工具配置。手動順利旋入並到達正確的就位位置，與讀取最終扭矩值同樣重要。</p>
<p>鎖緊前先核對單位與偏移轉接頭；如有卡滯、頂底、密封件損壞或扭矩過大，立即停止。完成後檢查通氣路徑是否暢通，並執行指定功能檢查。這個順序能讓扭矩設定值與其要控制的組件相互對應。</p>
<h2 id="faqs-about-screw-in-vent-plug-torque">旋入式透氣塞扭力常見問題</h2>
<h3 id="can-i-choose-vent-plug-torque-from-thread-size-alone">僅憑螺紋尺寸就能選擇透氣塞的扭力值嗎？</h3>
<p>請採用適用於完整透氣塞及其配合引入口的數值或鎖合方法。螺紋尺寸只說明部分配合狀況；本體、密封件、承靠面、摩擦狀態與工具方法也會影響鎖緊。</p>
<h3 id="should-i-reduce-torque-for-an-aluminum-enclosure">鋁製外殼是否應降低扭力值？</h3>
<p>請使用指定給該透氣塞與鋁製引入口的數值。螺紋材料及有效咬合長度會影響接合，因此不應依另一組件的數值套用通用百分比來降低扭矩。若沒有涵蓋此組合，請在安裝前向供應商確認。</p>
<h3 id="can-i-add-anti-seize-or-threadlocker-before-tightening">鎖緊前可以添加防咬合劑或螺紋固定劑嗎？</h3>
<p>只有在安裝說明指定時才使用該材料。用量、位置及固化狀態可能影響摩擦、承靠、材料相容性與後續拆卸。處理材料應遠離膜片與通氣路徑。</p>
<h3 id="what-should-i-do-if-the-torque-setting-was-exceeded">超出扭力設定值後應怎麼處理？</h3>
<p>依製造商程序停止並檢查透氣塞、密封件、配合螺紋、承靠面及任何受影響的接合處。遵循其更換或重用標準。鬆開後再鎖緊，無法恢復永久變形或密封件損壞。</p>
<h3 id="does-reaching-the-specified-torque-prove-the-vent-is-working">達到指定扭力值是否能證明透氣塞正常運作？</h3>
<p>達到扭矩只完成一個機械步驟。接著檢查組件是否就位、方向是否正確及通氣路徑是否暢通，再依該安裝方式執行指定的氣流、排水或外殼檢查。</p>
<h3 id="sources-and-technical-references">資料來源與技術參考</h3>
<ul>
<li><a href="https://standards.nasa.gov/standard/MSFC/MSFC-STD-486">NASA，MSFC-STD-486 官方範圍與修訂紀錄</a>，查閱日期 2026-10-29。</li>
<li><a href="https://standards.nasa.gov/sites/default/files/standards/MSFC/B/0/MSFC-STD-486-B.pdf">NASA，MSFC-STD-486-B，第 4.2–4.5 節，印刷版第 7–8 頁</a>，查閱日期 2026-10-29。</li>
<li><a href="https://www.nist.gov/pml/special-publication-811/nist-guide-si-appendix-b-conversion-factors/nist-guide-si-appendix-b9">NIST，《國際單位制指南》附錄 B.9：扭矩換算係數</a>，查閱日期 2026-10-29。</li>
<li><a href="https://www.nist.gov/metrology/metrological-traceability">NIST，計量追溯政策與常見問答</a>，查閱日期 2026-10-29。</li>
</ul>