# 工程師指南：極端天候防護用耐大量水噴淋電纜密封接頭

> Source: https://chinacableglands.com/zh-hant/blog/the-engineers-guide-to-deluge-proof-glands-for-extreme-weather-protection/
> Language: zh-Hant
> Publisher: 倍拓電纜接頭
> Author: Edward Wang
> Published: 2026-04-09
> Updated: 2026-10-29

選擇適用於暴雨與淹水環境的防洪型電纜固定頭。計算靜水頭、檢查兩處密封，並規劃安裝方式及惡劣天候後的安全復原。

<p><strong>選擇防洪型電纜固定頭時，先依引入口處的水暴露情況判斷，再讓電纜密封與箱體連接都符合該工況。</strong>我會先確認最高水位、可能持續多久，以及水流朝設備移動的路徑。抬高安裝位置、排水及電纜佈線可降低密封件承受的負荷。剩餘的浸水或水柱暴露情況，決定所需的固定頭、配件及安裝後的箱體配置。</p>
<p>本文所稱「防洪型」是指防護惡劣天候與淹水。<a href="/zh-hant/blog/what-is-deluge-protection-dts01-and-why-do-offshore-cable-glands-need-it/">DTS01 消防雨淋防護</a>屬於另一種應用，並有其專門要求。</p>
<blockquote>
<p><strong>重點摘要</strong></p>
<ul>
<li>選擇固定頭前，先界定每個引入口的水位與持續時間。</li>
<li>若同時需要 IP68 浸水與 IP69 水柱防護，分別核對兩者的條件。</li>
<li>一併檢查電纜密封、壁面密封、其他開口及電纜路徑。</li>
<li>選定確切的電纜直徑範圍、入口螺紋及密封配件。</li>
<li>將檢查與安全復原納入防洪設計。</li>
</ul>
</blockquote>
<h2 id="what-does-deluge-proof-mean-for-an-outdoor-cable-entry">戶外電纜引入口所稱的「防洪型」是什麼意思？</h2>
<p><strong>淹水設計依據</strong>是用來設計安裝方式的一組水位、持續時間、負載及復原假設。它能將「極端天候」這類概括說法，轉化為可與固定頭及箱體配置比較的具體條件。</p>
<p>我會區分風驅雨、積水、短暫浸沒、長時間浸沒及沖洗。波浪、漂流物、受污染的水和溫度變化則帶來不同要求。引入口若始終高於水位，其工況便不同於位於同一機箱底部附近的引入口。</p>
<p><a href="https://webstore.iec.ch/en/publication/2452">IEC 60529</a> 將外殼提供的防護分級。<a href="https://webstore.iec.ch/en/publication/7034">IEC 62444:2010</a> 涵蓋交付時完整固定頭的結構與性能。選型時要連結這兩個層級：先選擇固定頭，再搭配電纜、箱壁與配件安裝，使整個外殼維持所需防護。</p>
<p><a href="https://www.beama.org.uk/static/uploaded/40d16894-02a6-40f0-b15e126ffa4f1ccb.pdf">BEAMA《IP 代碼指南》</a>說明防水分級與較廣泛天候條件之間的差異。腐蝕、紫外線、凝結及機械作用仍需另行考量。我會參考《<a href="/zh-hant/resource-center/cable-entry-glossary/">電纜引入口術語表</a>》，釐清入口螺紋、密封件及其他零件名稱。</p>
<h3 id="keep-immersion-and-jet-duties-separate">分開考量浸水與水柱工況</h3>
<p>IP68 涵蓋指定條件下的浸水。記錄適用的深度或壓力、持續時間、電纜及安裝配置。IP69 涵蓋高壓、高溫水柱。若安裝環境同時涉及兩者，必須同時符合兩者的要求；較高的數字不會把兩種測試合併。</p>
<p><a href="/zh-hant/blog/ip-protection-ratings-explained-how-to-choose-the-right-cable-gland-based-on-iec-60529-standards/">IEC 60529 選型指南</a>說明防護等級的選擇。在本次洪水評估中，我會以簡明方式區分：水位決定靜水頭；水柱則帶來不同的局部負荷與暴露模式。兩種標示都不會說明水質或洪水後的復原計畫。</p>
<h2 id="trace-four-possible-water-paths">追查四種可能的進水路徑</h2>
<p><strong>密封邊界</strong>是將箱體內部與周圍水體隔開的各個介面。電纜周圍的良好密封只是邊界的一部分。水也可能從箱壁連接處、門板、其他開口，或將逕流導向引入口的電纜路徑進入內部。</p>
<figure class="blog-chart" style="container-type: inline-size;">
<svg xmlns="http&#58;//www.w3.org/2000/svg" id="deluge-water-path-map" viewBox="0 0 480 1081.5" role="img" aria-labelledby="deluge-water-path-title deluge-water-path-desc" style="width:100%;height:auto;font-family:var(--font-body); width: 100% !important; max-width: 100% !important; height: auto !important;">
<style>
#deluge-water-path-map { --svg-body-screen: 17px; }
@media (max-width: 760px) { #deluge-water-path-map { --svg-body-screen: 16px; } }
</style>
<title id="deluge-water-path-title">淹水曝露電纜引入口的四項水路檢查</title>
<desc id="deluge-water-path-desc">四張直向卡片分別標示電纜與接頭間的密封、接頭與壁面間的密封、外殼的其他開口，以及包含排水或抬高設置的電纜佈線。設計淹水水位與實際曝露條件，決定完整安裝外殼的密封、安裝及檢查條件。</desc>
<style>
#deluge-water-path-map{--wp-bg:var(--surface-card,#fff);--wp-panel:var(--surface-muted,#f3f6f8);--wp-text:var(--color-carbon,#17222b);--wp-muted:var(--color-graphite,#4b5963);--wp-line:var(--color-cloud,#c7d0d8);--wp-metal:var(--color-ash,#eef2f4);--wp-accent:var(--color-primary,#007b83);--wp-cable:#3f4a52}
:root[data-theme="dark"] #deluge-water-path-map{--wp-bg:#10171d;--wp-panel:#19242c;--wp-text:#f4f7f9;--wp-muted:#c9d2d9;--wp-line:#53636f;--wp-metal:#33414b;--wp-accent:#59d2d9;--wp-cable:#c0cbd2}
#deluge-water-path-map .wp-bg{fill:var(--wp-bg)}
#deluge-water-path-map .wp-panel{fill:var(--wp-panel);stroke:var(--wp-line);stroke-width:2}
#deluge-water-path-map .wp-title{fill:var(--wp-text);font-size:26px;font-weight:750}
#deluge-water-path-map .wp-label{fill:var(--wp-text);font-size:20px;font-weight:750}
#deluge-water-path-map .wp-note{fill:var(--wp-muted);font-size:18px}
#deluge-water-path-map .wp-number{fill:var(--wp-text);font-size:20px;font-weight:750;text-anchor:middle}
#deluge-water-path-map .wp-accent{fill:var(--wp-accent);stroke:var(--wp-accent);stroke-width:2}
#deluge-water-path-map .wp-line{fill:none;stroke:var(--wp-text);stroke-width:3;stroke-linecap:round;stroke-linejoin:round}
#deluge-water-path-map .wp-cable{fill:none;stroke:var(--wp-cable);stroke-width:16;stroke-linecap:round}
#deluge-water-path-map .wp-metal{fill:var(--wp-metal);stroke:var(--wp-text);stroke-width:2}
#deluge-water-path-map .wp-divider{stroke:var(--wp-text);stroke-width:2}
</style>
<defs>
<marker id="deluge-water-path-arrow" markerWidth="9" markerHeight="9" refX="8" refY="4.5" orient="auto">
<path d="M0 0L9 4.5L0 9Z" fill="var(--wp-accent)"/>
</marker>
</defs>
<rect class="wp-bg" width="480" height="1081.5" rx="24" y="0"/>
<text class="wp-title" x="24" y="44" style="font-size: calc(22px * 480px / 100cqw) !important;">追蹤水流路徑</text>
<text class="wp-note" x="24" y="73" style="font-size: calc(var(--svg-body-screen) * 480px / 100cqw) !important;">電纜引入口的四項檢查。</text>
<rect class="wp-panel" x="20" y="96" width="440" height="188" rx="18"/>
<circle fill="var(--wp-bg)" stroke="var(--wp-accent)" stroke-width="2" cx="58" cy="130" r="18"/>
<text class="wp-number" x="58" y="137" style="font-size: calc(16px * 480px / 100cqw) !important;">1</text>
<path class="wp-cable" d="M52 220 H112"/>
<path class="wp-metal" d="M98 186 H130 L142 220 L130 254 H98 Z"/>
<rect class="wp-accent" x="108" y="182" width="12" height="76" rx="6"/>
<text class="wp-label" x="160" y="133" style="font-size: calc(18px * 480px / 100cqw) !important;">電纜處的密封</text>
<text class="wp-note" x="160" y="166" style="font-size: calc(var(--svg-body-screen) * 480px / 100cqw) !important;">檢查外被表面。</text>
<text class="wp-note" x="160" y="190" style="font-size: calc(var(--svg-body-screen) * 480px / 100cqw) !important;">核對完整 OD 範圍。</text>
<text class="wp-note" x="160" y="231" style="font-size: calc(var(--svg-body-screen) * 480px / 100cqw) !important;">納入電纜公差</text>
<text class="wp-note" x="160" y="255" style="font-size: calc(var(--svg-body-screen) * 480px / 100cqw) !important;">及外被狀態。</text>
<rect class="wp-panel" x="20" y="300" width="440" height="189.497" rx="18"/>
<circle fill="var(--wp-bg)" stroke="var(--wp-accent)" stroke-width="2" cx="58" cy="334" r="18"/>
<text class="wp-number" x="58" y="341" style="font-size: calc(16px * 480px / 100cqw) !important;">2</text>
<rect class="wp-metal" x="94" y="346" width="20" height="113.497"/>
<path class="wp-metal" d="M48 383.497 H94 V423.497 H48 L38 403.497 Z"/>
<rect class="wp-accent" x="83" y="375.497" width="11" height="56" rx="5"/>
<path class="wp-line" d="M114 375.497 H133 M114 387.497 H133 M114 419.497 H133 M114 431.497 H133"/>
<text class="wp-label" x="160" y="337" style="font-size: calc(18px * 480px / 100cqw) !important;">壁面處的密封</text>
<text class="wp-note" x="160" y="370" style="font-size: calc(var(--svg-body-screen) * 480px / 100cqw) !important;">檢查孔洞及表面。</text>
<text class="wp-note" x="160" y="395.497" style="font-size: calc(var(--svg-body-screen) * 480px / 100cqw) !important;">確認螺紋咬合。</text>
<text class="wp-note" x="160" y="436.497" style="font-size: calc(var(--svg-body-screen) * 480px / 100cqw) !important;">安裝指定墊圈。</text>
<text class="wp-note" x="160" y="460.497" style="font-size: calc(var(--svg-body-screen) * 480px / 100cqw) !important;">依規定方式鎖緊。</text>
<rect class="wp-panel" x="20" y="505.497" width="440" height="188" rx="18"/>
<circle fill="var(--wp-bg)" stroke="var(--wp-accent)" stroke-width="2" cx="58" cy="539.497" r="18"/>
<text class="wp-number" x="58" y="546.497" style="font-size: calc(16px * 480px / 100cqw) !important;">3</text>
<rect class="wp-metal" x="42" y="581.497" width="92" height="78" rx="8"/>
<line class="wp-divider" x1="70" y1="581.497" x2="70" y2="659.497"/>
<circle class="wp-bg" cx="105" cy="619.497" r="15" stroke="var(--wp-text)" stroke-width="2"/>
<path class="wp-line" d="M96 610.497 L114 628.497 M114 610.497 L96 628.497"/>
<text class="wp-label" x="160" y="542.497" style="font-size: calc(18px * 480px / 100cqw) !important;">其他開口</text>
<text class="wp-note" x="160" y="575.497" style="font-size: calc(var(--svg-body-screen) * 480px / 100cqw) !important;">檢查塞頭與門板。</text>
<text class="wp-note" x="160" y="599.497" style="font-size: calc(var(--svg-body-screen) * 480px / 100cqw) !important;">檢查接縫與排水口。</text>
<text class="wp-note" x="160" y="640.497" style="font-size: calc(var(--svg-body-screen) * 480px / 100cqw) !important;">納入每一個開口</text>
<text class="wp-note" x="160" y="664.497" style="font-size: calc(var(--svg-body-screen) * 480px / 100cqw) !important;">進行箱體檢查。</text>
<rect class="wp-panel" x="20" y="709.497" width="440" height="224" rx="18"/>
<circle fill="var(--wp-bg)" stroke="var(--wp-accent)" stroke-width="2" cx="58" cy="743.497" r="18"/>
<text class="wp-number" x="58" y="750.497" style="font-size: calc(16px * 480px / 100cqw) !important;">4</text>
<path class="wp-cable" d="M48 847.497 V811.497 Q48 787.497 72 787.497 H126"/>
<path class="wp-line" d="M86 837.497 Q106 825.497 126 837.497 M86 857.497 Q106 845.497 126 857.497" stroke="var(--wp-accent)"/>
<path d="M58 885.497 H130" fill="none" stroke="var(--wp-accent)" stroke-width="3" marker-end="url(#deluge-water-path-arrow)"/>
<path d="M58 899.497 H112" fill="none" stroke="var(--wp-accent)" stroke-width="3" marker-end="url(#deluge-water-path-arrow)"/>
<text class="wp-label" x="160" y="746.497" style="font-size: calc(18px * 480px / 100cqw) !important;">路徑與暴露</text>
<text class="wp-note" x="160" y="779.497" style="font-size: calc(var(--svg-body-screen) * 480px / 100cqw) !important;">將水流導離</text>
<text class="wp-note" x="160" y="803.497" style="font-size: calc(var(--svg-body-screen) * 480px / 100cqw) !important;">電纜引入口。</text>
<text class="wp-note" x="160" y="844.497" style="font-size: calc(var(--svg-body-screen) * 480px / 100cqw) !important;">利用抬高位置或排水</text>
<text class="wp-note" x="160" y="868.497" style="font-size: calc(var(--svg-body-screen) * 480px / 100cqw) !important;">降低暴露。</text>
<text class="wp-note" x="160" y="909.497" style="font-size: calc(var(--svg-body-screen) * 480px / 100cqw) !important;">檢查淹水水位與時間。</text>
<text class="wp-label" x="24" y="979.497" style="font-size: calc(18px * 480px / 100cqw) !important;">設計水位</text>
<text class="wp-note" x="24" y="1010.5" style="font-size: calc(var(--svg-body-screen) * 480px / 100cqw) !important;">淹水水位 → 組件</text>
<text class="wp-note" x="24" y="1034.5" style="font-size: calc(var(--svg-body-screen) * 480px / 100cqw) !important;">安裝 → 檢查</text>
<text class="wp-note" x="24" y="1058.5" style="font-size: calc(var(--svg-body-screen) * 480px / 100cqw) !important;">檢查每一條進水路徑。</text>
</svg>
<figcaption>這四項檢查追查外部水路，涵蓋電纜密封、接頭與壁面介面、外殼的其他開口及電纜佈線。排水與抬高設置可減少到達這些介面的水量。</figcaption>
</figure>
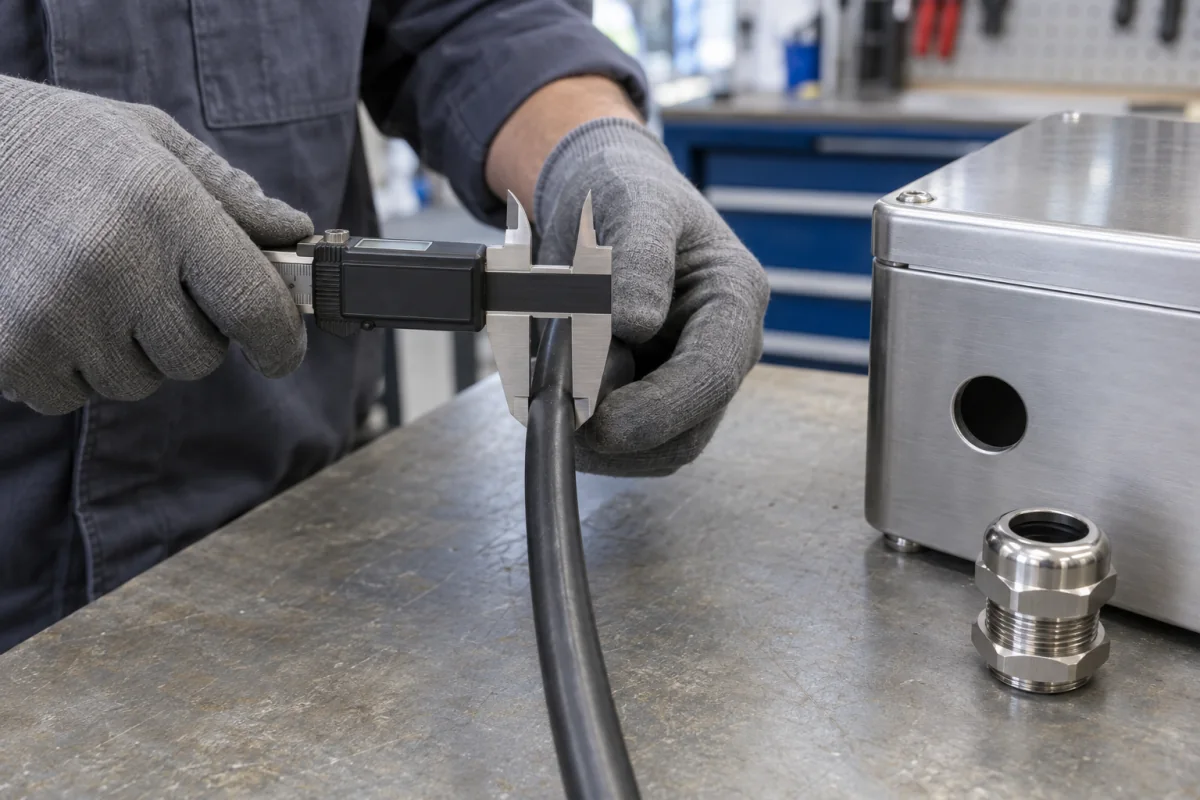
<p>在電纜處，檢查密封件實際壓靠的表面。若固定頭設計為密封圓形外被，該表面應完整、清潔，且直徑須落在完整允許外徑範圍內。還要納入製造公差與橢圓度，也就是截面偏離圓形的程度。若編織層、鎧裝、凸肋、膠帶或受損外被露出，則需採用適用於該結構的密封配置。</p>
<p>在箱壁處，我會區分有螺紋的開口與由鎖緊螺帽固定的間隙孔。檢查開口尺寸、壁厚、平整度、塗層及密封面的貼合情況。即使電纜密封已正確壓縮，墊圈若傾斜或密封面粗糙，仍可能形成進水路徑。</p>
<p>接著檢查封堵塞、門板、接縫、導管、排水口、通氣口及現場加工的孔洞。也要把配件及允許的安裝方向納入考量。<a href="/zh-hant/blog/double-compression-vs-single-compression-glands-a-definitive-guide/">單壓縮與雙壓縮接頭比較</a>可說明兩者的功能差異；密封件數量本身無法決定整個箱體的防水工況。</p>
<figure class="blog-chart" style="container-type: inline-size;">
<svg xmlns="http&#58;//www.w3.org/2000/svg" id="deluge-gland-component-map" viewBox="0 0 480 1005" role="img" aria-labelledby="deluge-gland-component-title deluge-gland-component-desc" style="width:100%;height:auto;font-family:var(--font-body); width: 100% !important; max-width: 100% !important; height: auto !important;">
<style>
#deluge-gland-component-map { --svg-body-screen: 17px; }
@media (max-width: 760px) { #deluge-gland-component-map { --svg-body-screen: 16px; } }
</style>
<title id="deluge-gland-component-title">非鎧裝電纜接頭的六個功能零件示例</title>
<desc id="deluge-gland-component-desc">垂直零件圖將鎖緊螺帽、引入口 O 形環及接頭本體歸在外殼介面一側，再將電纜密封件、夾爪及密封螺帽歸在電纜壓縮介面一側。確切產品圖面規定組裝順序；侵入防護佐證則適用於完整安裝組件。</desc>
<style>
#deluge-gland-component-map{--dg-bg:var(--surface-card,#fff);--dg-panel:var(--surface-muted,#f3f6f8);--dg-text:var(--color-carbon,#17222b);--dg-muted:var(--color-graphite,#4b5963);--dg-line:var(--color-cloud,#c7d0d8);--dg-metal:#aeb9c2;--dg-metal-hi:#e4e9ed;--dg-seal:#26323a;--dg-accent:var(--color-primary,#007b83)}
:root[data-theme="dark"] #deluge-gland-component-map{--dg-bg:#10171d;--dg-panel:#19242c;--dg-text:#f4f7f9;--dg-muted:#c9d2d9;--dg-line:#53636f;--dg-metal:#98a8b3;--dg-metal-hi:#d5dde2;--dg-seal:#0a0f13;--dg-accent:#59d2d9}
#deluge-gland-component-map .dg-bg{fill:var(--dg-bg)}
#deluge-gland-component-map .dg-panel{fill:var(--dg-panel);stroke:var(--dg-line);stroke-width:2}
#deluge-gland-component-map .dg-title{fill:var(--dg-text);font-size:26px;font-weight:750}
#deluge-gland-component-map .dg-group{fill:var(--dg-text);font-size:18px;font-weight:750;letter-spacing:.3px}
#deluge-gland-component-map .dg-label{fill:var(--dg-text);font-size:20px;font-weight:750}
#deluge-gland-component-map .dg-note{fill:var(--dg-muted);font-size:18px}
#deluge-gland-component-map .dg-metal{fill:var(--dg-metal);stroke:var(--dg-text);stroke-width:2}
#deluge-gland-component-map .dg-metal-hi{fill:var(--dg-metal-hi);stroke:var(--dg-text);stroke-width:2}
#deluge-gland-component-map .dg-seal{fill:var(--dg-seal);stroke:var(--dg-text);stroke-width:2}
#deluge-gland-component-map .dg-detail{fill:none;stroke:var(--dg-text);stroke-width:2;stroke-linecap:round;stroke-linejoin:round}
#deluge-gland-component-map .dg-divider{stroke:var(--dg-line);stroke-width:2}
</style>
<rect class="dg-bg" width="480" height="1005" rx="24"/>
<text class="dg-title" x="24" y="44" style="font-size: calc(22px * 480px / 100cqw) !important;">固定頭的六個部件</text>
<text class="dg-note" x="24" y="73" style="font-size: calc(var(--svg-body-screen) * 480px / 100cqw) !important;">依產品圖確認。</text>
<rect class="dg-panel" x="20" y="96" width="440" height="394" rx="18"/>
<text class="dg-group" x="40" y="128" style="font-size: calc(18px * 480px / 100cqw) !important;">箱體介面</text>
<line class="dg-divider" x1="40" y1="144" x2="440" y2="144"/>
<polygon class="dg-metal-hi" points="52,184 72,166 116,166 136,184 116,202 72,202"/>
<ellipse class="dg-bg" cx="94" cy="184" rx="23" ry="10" stroke="var(--dg-text)" stroke-width="2"/>
<text class="dg-label" x="164" y="181" style="font-size: calc(18px * 480px / 100cqw) !important;">鎖緊螺帽</text>
<text class="dg-note" x="164" y="207" style="font-size: calc(var(--svg-body-screen) * 480px / 100cqw) !important;">將接頭本體固定於</text>
<text class="dg-note" x="164" y="231" style="font-size: calc(var(--svg-body-screen) * 480px / 100cqw) !important;">無螺紋通孔中</text>
<ellipse class="dg-detail" cx="94" cy="262" rx="37" ry="15" stroke-width="8"/>
<text class="dg-label" x="164" y="259" style="font-size: calc(18px * 480px / 100cqw) !important;">引入口 O 形環</text>
<text class="dg-note" x="164" y="285" style="font-size: calc(var(--svg-body-screen) * 480px / 100cqw) !important;">密封箱壁介面</text>
<path class="dg-metal" d="M58 350h72v42H58zM70 326h48v24H70zM70 392h48v38H70z"/>
<path class="dg-detail" d="M73 331h42M73 338h42M73 399h42M73 407h42M73 415h42"/>
<text class="dg-label" x="164" y="360" style="font-size: calc(18px * 480px / 100cqw) !important;">接頭本體</text>
<text class="dg-note" x="164" y="386" style="font-size: calc(var(--svg-body-screen) * 480px / 100cqw) !important;">承載入口螺紋</text>
<text class="dg-note" x="164" y="410" style="font-size: calc(var(--svg-body-screen) * 480px / 100cqw) !important;">及電纜側組件。</text>
<text class="dg-note" x="40" y="457" style="font-size: calc(var(--svg-body-screen) * 480px / 100cqw) !important;">為所選入口使用</text>
<text class="dg-note" x="40" y="481" style="font-size: calc(var(--svg-body-screen) * 480px / 100cqw) !important;">指定的密封件類型。</text>
<rect class="dg-panel" x="20" y="512" width="440" height="354" rx="18"/>
<text class="dg-group" x="40" y="544" style="font-size: calc(18px * 480px / 100cqw) !important;">電纜壓緊</text>
<line class="dg-divider" x1="40" y1="560" x2="440" y2="560"/>
<path class="dg-seal" d="M67 595h54l9 48H58z"/>
<ellipse class="dg-bg" cx="94" cy="597" rx="18" ry="7" stroke="var(--dg-text)" stroke-width="2"/>
<text class="dg-label" x="164" y="606" style="font-size: calc(18px * 480px / 100cqw) !important;">電纜密封件</text>
<text class="dg-note" x="164" y="632" style="font-size: calc(var(--svg-body-screen) * 480px / 100cqw) !important;">密封電纜外被</text>
<text class="dg-note" x="164" y="656" style="font-size: calc(var(--svg-body-screen) * 480px / 100cqw) !important;">並符合標示的外徑範圍。</text>
<path class="dg-metal-hi" d="M58 684h72l-8 48H66z"/>
<path class="dg-detail" d="M68 688l5 38M82 688l3 42M96 688v43M110 688l-3 42M124 688l-5 38"/>
<text class="dg-label" x="164" y="696" style="font-size: calc(18px * 480px / 100cqw) !important;">夾爪</text>
<text class="dg-note" x="164" y="722" style="font-size: calc(var(--svg-body-screen) * 480px / 100cqw) !important;">將鎖緊力傳遞至</text>
<text class="dg-note" x="164" y="746" style="font-size: calc(var(--svg-body-screen) * 480px / 100cqw) !important;">電纜密封件周圍</text>
<polygon class="dg-metal" points="55,794 72,776 116,776 133,794 124,830 64,830"/>
<ellipse class="dg-bg" cx="94" cy="794" rx="22" ry="9" stroke="var(--dg-text)" stroke-width="2"/>
<text class="dg-label" x="164" y="794" style="font-size: calc(18px * 480px / 100cqw) !important;">密封螺帽</text>
<text class="dg-note" x="164" y="820" style="font-size: calc(var(--svg-body-screen) * 480px / 100cqw) !important;">透過閉合組件</text>
<text class="dg-note" x="164" y="844" style="font-size: calc(var(--svg-body-screen) * 480px / 100cqw) !important;">壓縮密封件</text>
<text class="dg-note" x="24" y="909" style="font-size: calc(var(--svg-body-screen) * 480px / 100cqw) !important;">依產品說明確認</text>
<text class="dg-note" x="24" y="933" style="font-size: calc(var(--svg-body-screen) * 480px / 100cqw) !important;">零件順序與方向。</text>
<text class="dg-note" x="24" y="957" style="font-size: calc(var(--svg-body-screen) * 480px / 100cqw) !important;">依規定方式鎖緊。</text>
<text class="dg-note" x="24" y="981" style="font-size: calc(var(--svg-body-screen) * 480px / 100cqw) !important;">檢查兩處密封介面。</text>
</svg>
<figcaption>此零件圖將外殼側零件與電纜側的壓縮零件堆疊分開呈現，示例為一款非鎧裝接頭。可用它辨識六種常見零件，再依確切產品圖面及安裝說明確認組裝順序。</figcaption>
</figure>
<p>部件示意圖可協助辨認這兩個介面。若所選設計有入口 O 形環或墊圈，該零件會在箱壁處形成密封；電纜密封件和閉合零件則作用於外被。請依所選產品圖確認零件順序與方向；無鎧裝電纜的示例不能取代鎧裝或屏蔽電纜的端接要求。</p>
<h2 id="determine-the-water-head-at-each-entry">計算每個引入口的水頭</h2>
<p><strong>靜水頭</strong>是評估點上方的垂直液體深度。淹水水位與引入口位置應採用同一高程基準。位於較低處的開口，在同一水面下承受的靜水壓力高於較高處的開口。</p>
<table>
<thead>
<tr>
<th>設計輸入項目</th>
<th>現場需確認的資料</th>
<th>對引入口的影響</th>
</tr>
</thead>
<tbody>
<tr>
<td>水源</td>
<td>雨水、地下水、河水、風暴潮、製程用水、污水或沖洗水</td>
<td>會改變水質、漂流物、溫度與流動狀況。</td>
</tr>
<tr>
<td>最高水位</td>
<td>水位高程及每個易受影響開口的高度</td>
<td>決定該開口處的靜水頭。</td>
</tr>
<tr>
<td>持續時間與重複發生情況</td>
<td>預期浸沒時間及反覆乾濕循環</td>
<td>決定浸水與復原工況。</td>
</tr>
<tr>
<td>動態效應</td>
<td>水流、波浪、水柱、漂流物與電纜移動</td>
<td>帶來靜水之外的額外負荷。</td>
</tr>
<tr>
<td>溫度</td>
<td>水、空氣、電纜與箱體條件</td>
<td>會影響密封件、本體及壓力差。</td>
</tr>
<tr>
<td>後果</td>
<td>關鍵功能、停機影響及現場可及性</td>
<td>決定抬高、備援及更換的優先順序。</td>
</tr>
</tbody>
</table>
<h3 id="worked-example-raising-an-entry-reduces-static-pressure">計算示例：抬高引入口可降低靜水壓力</h3>
<p>假設某箱體的設計水位高於當地基準面 <strong>2.4 m</strong>。引入口原本位於 <strong>0.6 m</strong>，因此該處水頭為 <strong>1.8 m</strong>。將引入口移至 <strong>1.4 m</strong> 後，水頭降為 <strong>1.0 m</strong>。假設淡水密度為 <strong>1,000 kg/m³</strong>、重力加速度為 <strong>9.80665 m/s²</strong>，且箱體內部與水面處在相同的參考大氣壓力下。</p>
<p>水體靜止時，表壓可由單位面積上方水柱的重量計算：</p>
<div class="article-math article-math-display" data-latex="p = \rho g h"><span class="katex"><math xmlns="http://www.w3.org/1998/Math/MathML" display="block"><semantics><mrow><mi>p</mi><mo>=</mo><mi>ρ</mi><mi>g</mi><mi>h</mi></mrow><annotation encoding="application/x-tex">p = \rho g h</annotation></semantics></math></span></div>
<p>其中，<span class="article-math article-math-inline" data-latex="p"><span class="katex"><math xmlns="http://www.w3.org/1998/Math/MathML"><semantics><mrow><mi>p</mi></mrow><annotation encoding="application/x-tex">p</annotation></semantics></math></span></span> 表示以帕斯卡（Pa）為單位的壓力，<span class="article-math article-math-inline" data-latex="\rho"><span class="katex"><math xmlns="http://www.w3.org/1998/Math/MathML"><semantics><mrow><mi>ρ</mi></mrow><annotation encoding="application/x-tex">\rho</annotation></semantics></math></span></span> 表示液體密度（kg/m³），<span class="article-math article-math-inline" data-latex="g"><span class="katex"><math xmlns="http://www.w3.org/1998/Math/MathML"><semantics><mrow><mi>g</mi></mrow><annotation encoding="application/x-tex">g</annotation></semantics></math></span></span> 表示重力加速度（m/s²），<span class="article-math article-math-inline" data-latex="h"><span class="katex"><math xmlns="http://www.w3.org/1998/Math/MathML"><semantics><mrow><mi>h</mi></mrow><annotation encoding="application/x-tex">h</annotation></semantics></math></span></span> 表示垂直水頭（m）。</p>
<table>
<thead>
<tr>
<th>引入口高程</th>
<th>水頭</th>
<th>計算所得靜態表壓</th>
</tr>
</thead>
<tbody>
<tr>
<td>0.6 m</td>
<td>2.4 − 0.6 = 1.8 m</td>
<td>17,651.97 Pa，約 <strong>17.65 kPa</strong></td>
</tr>
<tr>
<td>1.4 m</td>
<td>2.4 − 1.4 = 1.0 m</td>
<td>9,806.65 Pa，約 <strong>9.81 kPa</strong></td>
</tr>
</tbody>
</table>
<p>將引入口抬高 <strong>0.8 m</strong>，可使靜水壓力降低約 <strong>44.4%</strong>。在假設的淹水事件中，兩個位置仍都會浸沒。若設計也假設水下持續 <strong>24 小時</strong>，該時間仍須列入要求；這是專案假設，並非通用的 IP68 測試持續時間。</p>
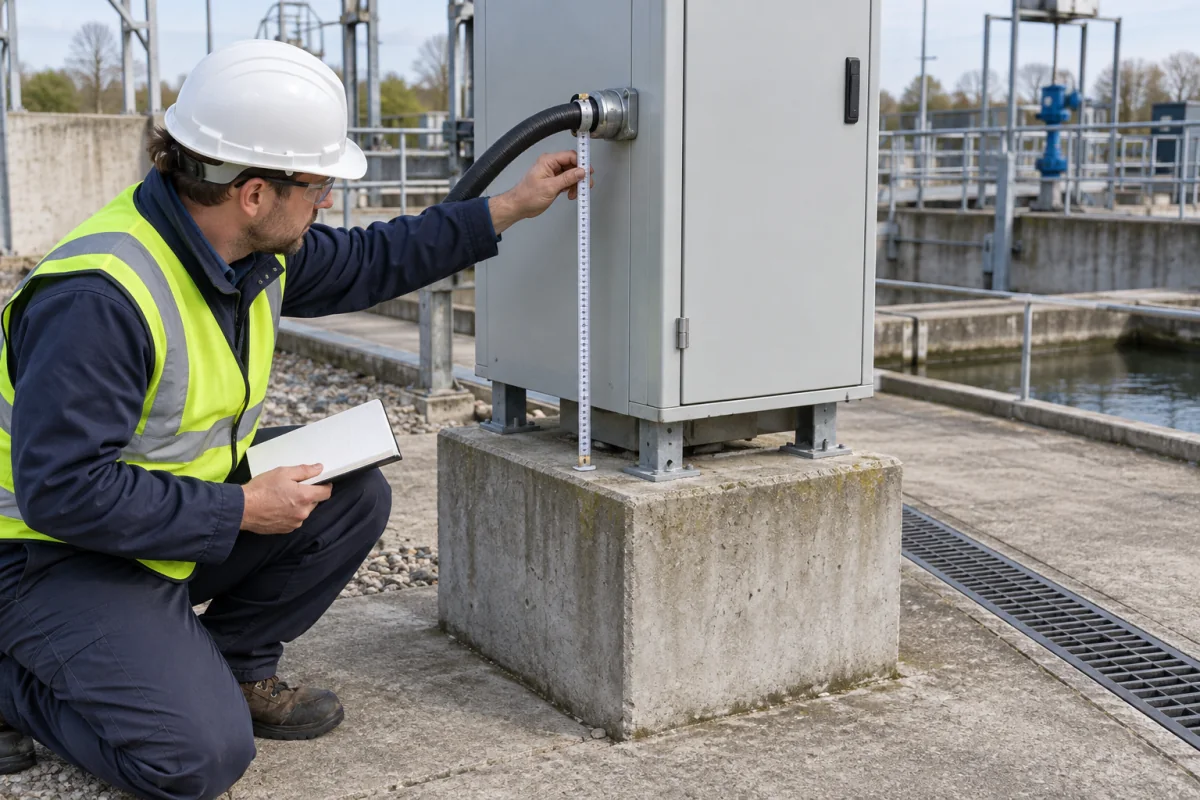
<p><a class="article-tool-card article-tool-card-link" href="/zh-hant/resource-center/tools/hydrostatic-pressure-calculator/" aria-label="靜水壓力計算器"><span class="article-tool-card-index">工具</span><span class="article-tool-card-kicker">壓力與環境</span><strong class="article-tool-card-title">靜水壓力計算器</strong><span class="article-tool-card-copy">輸入引入口上方的垂直水頭、液體密度及重力加速度。本假設示例中，水頭為 1.8 m 與 1.0 m，密度為 1000 kg/m³，重力為 9.80665 m/s²，算得 17.65 kPa 與 9.81 kPa。將這些靜態壓力及假設的持續時間，與完整組件的浸水條件比較；水流、衝擊、溫度及水質則分別評估。</span><span class="article-tool-card-formula">p = ρgh</span><span class="article-tool-card-inputs" aria-label="計算器輸入項目"><em>液體垂直深度</em><em>液體密度</em><em>重力加速度</em></span><span class="article-tool-card-action">開啟計算器 <span aria-hidden="true">-&gt;</span></span></a></p><p>我會用這項比較評估是否應先抬高引入口，再考慮更換固定頭。這也說明相關尺寸是引入口上方的水深，而非基準面上方的水深。也要檢查所有較低的接縫與開口。若溫度或滯留空氣會改變箱體內壓力，應將密封件兩側的實際壓差納入設計評估。</p>
<figure>
<img alt="工程師手持捲尺，從抬高的室外外殼電纜引入口量至混凝土基座頂部" src="/images/blog/the-engineers-guide-to-deluge-proof-glands-for-extreme-weather-protection/site-entry-elevation-survey.webp" srcset="/images/blog/the-engineers-guide-to-deluge-proof-glands-for-extreme-weather-protection/site-entry-elevation-survey-600.webp 600w, /images/blog/the-engineers-guide-to-deluge-proof-glands-for-extreme-weather-protection/site-entry-elevation-survey.webp 1200w" sizes="(max-width: 640px) 100vw, 1200px" width="1200" height="800" loading="lazy" decoding="async" />
<figcaption>技術人員測量引入口高於當地基座的高度，以確認其高程。</figcaption>
</figure>
<h2 id="reduce-exposure-before-specifying-the-sealing-parts">指定密封零件前，先降低水暴露</h2>
<p><a href="https://www.epa.gov/waterutilityresponse/flood-resilience-basic-guide-water-and-wastewater-utilities">美國環保署洪水韌性指南</a>（US EPA）將抬高設備、保護設備、排水及營運持續規劃一併考量。其公用事業指引建議遷移電氣控制設備、保持排水管路暢通、保護箱體，並備妥備用設備。</p>
<p>我會將這些措施與剩餘的涉水工況比較。抬高機櫃可降低浸水暴露；屏障可改變水流方向；易於維護的排水設施可減少積水。每項措施在假設的事件期間都必須持續有效。平時保持乾燥的腔室，也可能因排水受阻或水泵故障而淹水。</p>
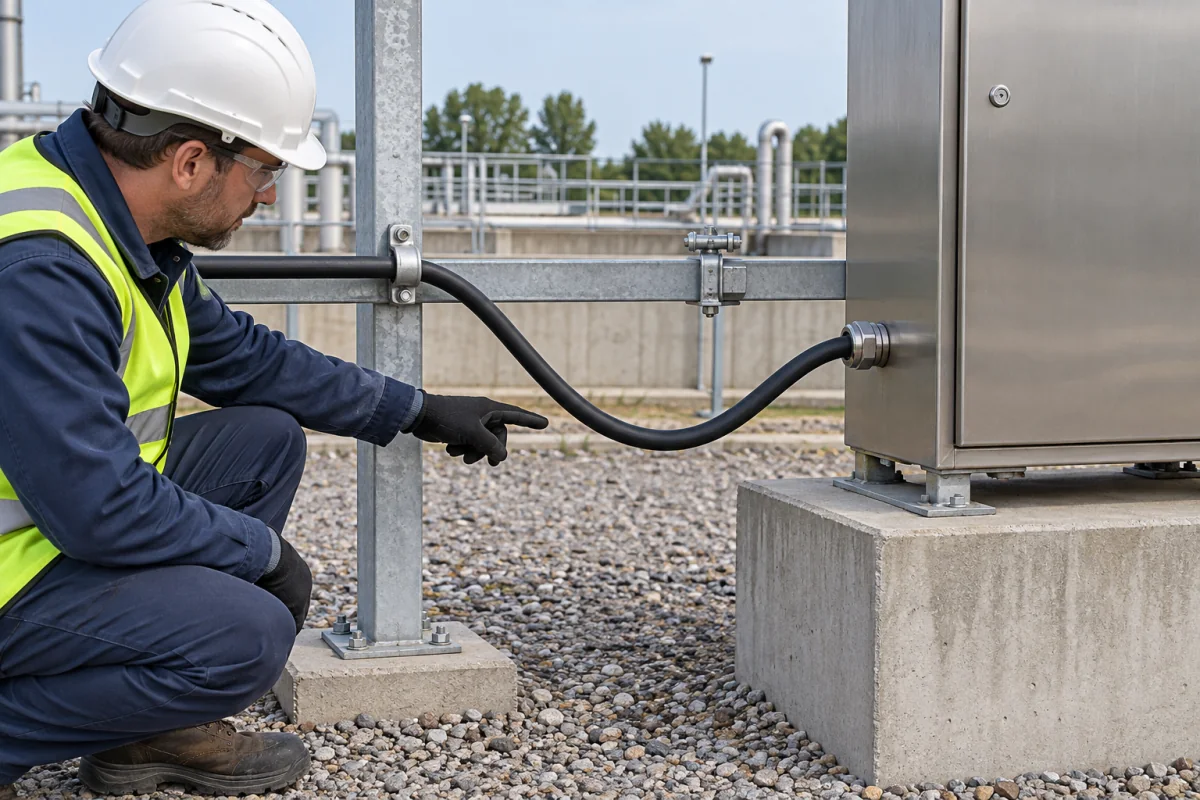
<p>電纜佈線應讓逕流遠離引入口，並維持電纜允許的彎曲半徑。適當支撐電纜，避免重量、移動或拉力對密封件造成不必要的負荷。若安裝空間允許設置低點或滴水彎，應避免形成缺乏支撐的彎折或積聚漂流物的位置。</p>
<p>排水或通氣設施只能採用箱體及其工況允許的配置。增加一個敞開式排水口，可能在浸水時成為進水口。抬高位置及妥善佈線可降低水暴露，但密封件和其他開口仍須承受實際到達的水。</p>
<h2 id="match-the-cable-wall-and-material-system">讓電纜、箱壁及材料系統相配</h2>
<p>我會將完整的固定頭配置與實際引入口比對。導體標稱截面積不能用來決定電纜密封件尺寸；應依電纜外被的完整外徑範圍、形狀、結構及狀態選擇。</p>
<table>
<thead>
<tr>
<th>介面或零件</th>
<th>選型檢查項目</th>
<th>原因</th>
</tr>
</thead>
<tbody>
<tr>
<td>電纜外被</td>
<td>最小與最大直徑、橢圓度、表面及電纜結構</td>
<td>密封件須在指定表面形成連續接觸。</td>
</tr>
<tr>
<td>引入口開孔</td>
<td>螺紋形式與尺寸，或間隙孔直徑</td>
<td>決定機械配合方式及允許的箱壁密封方法。</td>
</tr>
<tr>
<td>箱壁與配件</td>
<td>厚度、塗層、平整度、墊圈、鎖緊螺帽及轉接頭</td>
<td>決定貼合、可用的螺紋咬合長度及壁面密封方式。</td>
</tr>
<tr>
<td>固定頭本體與表面處理</td>
<td>材質等級、塗層、水質、鹽分、紫外線及溫度</td>
<td>用於選擇暴露於環境中的材料系統。</td>
</tr>
<tr>
<td>密封膠料</td>
<td>實際配方、液體、清潔化學品及溫度</td>
<td>使密封件的反應符合環境條件。</td>
</tr>
<tr>
<td>電纜端接</td>
<td>鎧裝、屏蔽、等電位連接、阻隔密封及認證要求</td>
<td>在防水之外，同時維持電氣功能與危險區用途要求。</td>
</tr>
</tbody>
</table>
<figure>
<img alt="技術人員將數位卡尺外測爪置於完整電纜護套兩側，旁邊是空置的外殼引入口及一個未安裝的接頭" src="/images/blog/the-engineers-guide-to-deluge-proof-glands-for-extreme-weather-protection/cable-jacket-od-fit-measurement.webp" srcset="/images/blog/the-engineers-guide-to-deluge-proof-glands-for-extreme-weather-protection/cable-jacket-od-fit-measurement-600.webp 600w, /images/blog/the-engineers-guide-to-deluge-proof-glands-for-extreme-weather-protection/cable-jacket-od-fit-measurement.webp 1200w" sizes="(max-width: 640px) 100vw, 1200px" width="1200" height="800" loading="lazy" decoding="async" />
<figcaption>將外卡尺量爪跨在完整電纜外被兩側，與固定頭的密封範圍比對。</figcaption>
</figure>
<p>不鏽鋼、鍍層黃銅與高分子材料在腐蝕行為、強度及電氣功能方面各有不同組合。<a href="/zh-hant/blog/cable-gland-materials-how-to-choose-the-right-material-for-your-specific-application/">材料組合選型指南</a>會一併考量本體、表面處理、密封件、箱體及電纜外被。若洪水受污染，也應將油類、燃料、污水、處理化學品及清潔程序納入比較。</p>
<p>EPDM、丁腈橡膠、矽橡膠及氟碳橡膠是密封材料族，各自有不同配方。我會依預期液體條件，採用所選膠料的相容性與溫度資料。這能讓材料選擇符合實際暴露情況，避免把同一橡膠材料族中的所有材料視為可互換。</p>
<p>將所選尺寸、安裝圖、電纜直徑範圍、配件清單及浸水條件一併保存。若變更電纜、墊圈、箱壁表面處理或轉接頭，應將新的組合與原配置比對。更換時尤其需要留意：外觀相近的固定頭，密封範圍或入口長度可能不同。</p>
<h2 id="install-the-two-seals-without-disturbing-either-one">安裝兩處密封時，避免擾動任何一處</h2>
<p><strong>安裝方法</strong>是所選引入口配置的一部分。依該型號與尺寸使用指定零件及鎖緊判準。若套用其他固定頭的扭矩、閉合尺寸或止擋位置，可能造成不同的壓縮量。</p>
<p>在處理電纜或引入口前，應由具資格的人員依現場電氣隔離程序執行隔離，並確保設備適合進行作業。保持敞開的接合處免受雨水、灰塵及積水影響。閉合組件前先檢查密封表面。</p>
<ol>
<li><strong>準備箱壁連接。</strong>檢查開孔、螺紋、塗層及密封面。將指定的墊圈或 O 形環裝在預定位置。</li>
<li><strong>準備電纜接觸面。</strong>將預定的外被區段置於密封件內。使用相容的方法清除污染物，並檢查是否受損。</li>
<li><strong>依指定順序組裝。</strong>讓密封件保持在定位狀態，並使用允許的鎖緊螺帽、轉接頭及其他配件。</li>
<li><strong>控制旋轉與壓縮。</strong>依指示固定固定頭本體，再鎖緊，避免扭轉電纜密封或壁面密封。採用該型號標示的鎖緊判準。</li>
<li><strong>檢查完成後的引入口。</strong>確認電纜位置、密封件貼合、螺紋咬合、支撐及佈線，然後執行所需的電氣與防水滲入檢查。</li>
</ol>
<p>額外加用膠帶、密封劑、第二個墊圈或護罩，可能改變貼合、螺紋咬合或化學接觸。只有在該固定頭與箱體的核准配置中允許時，才能加用這些零件。若現有配置無法滿足浸水工況，應改選合適的替換配置，不要假設增加鎖緊力或密封膠料就一定能提升防護。</p>
<p>現場檢查可確認施工品質與目前狀況。若需進行現場進水測試，應依適用程序執行；非正式噴水與標準化浸水或水柱測試的暴露條件不同。</p>
<figure>
<img alt="技術人員指向受支撐電纜路徑的低點；電纜隨後向上延伸並進入安裝於抬高外殼側面的接頭" src="/images/blog/the-engineers-guide-to-deluge-proof-glands-for-extreme-weather-protection/supported-drip-loop-route.webp" srcset="/images/blog/the-engineers-guide-to-deluge-proof-glands-for-extreme-weather-protection/supported-drip-loop-route-600.webp 600w, /images/blog/the-engineers-guide-to-deluge-proof-glands-for-extreme-weather-protection/supported-drip-loop-route.webp 1200w" sizes="(max-width: 640px) 100vw, 1200px" width="1200" height="800" loading="lazy" decoding="async" />
<figcaption>電纜受支撐後先向下延伸至低點，再向上連接側置式引入口。</figcaption>
</figure>
<h2 id="adapt-the-protection-to-the-application">依應用調整防護方式</h2>
<p>同一款固定頭在不同地點可能面臨不同的周遭風險。我會依應用情境，決定哪些系統控制措施應優先考量。</p>
<table>
<thead>
<tr>
<th>應用情境</th>
<th>主要評估的暴露情況</th>
<th>可採用的系統措施</th>
</tr>
</thead>
<tbody>
<tr>
<td>沿海機櫃</td>
<td>風驅雨、鹽霧、風暴潮及漂流物</td>
<td>抬高設備、設置遮蔽、採用相容金屬並安排可及的檢查位置。</td>
</tr>
<tr>
<td>地下外殼</td>
<td>地下水、長時間水頭及排水受阻</td>
<td>盡可能遷移設備、採用合適的箱體配置並監測水位。</td>
</tr>
<tr>
<td>供水或污水處理廠</td>
<td>洪水、化學品、污水及清潔作業</td>
<td>保護控制設備、備妥備品並制定設備復原計畫。</td>
</tr>
<tr>
<td>戶外電信設備</td>
<td>雨水、凝結、結冰及局部淹水</td>
<td>抬高安裝、支撐電纜佈線並監測設備狀況。</td>
</tr>
<tr>
<td>臨時緊急設備</td>
<td>搬運損傷、電纜變更及反覆接線</td>
<td>使用配套組件、抬高引入口，並在每次部署時檢查。</td>
</tr>
</tbody>
</table>
<p>對關鍵設備，除了評估事件期間的耐受能力，也要考量事件發生後的可及性。若無法安全抵達箱體，遠端監測、備援或遷移位置，可能比單獨更換固定頭更有價值。應規劃如何辨識並更換受損零件，同時盡量避免不必要地中斷必要功能。</p>
<h2 id="inspect-flood-exposed-equipment-before-return-to-service">檢查遭洪水浸水的設備，再恢復使用</h2>
<p>水暴露可能影響內部絕緣、端子及保護裝置，也可能影響可見的固定頭。具資格的人員完成所需評估與復原措施前，受影響設備應保持停用。<a href="https://www.makeitelectric.org/standards/evaluating-water-damaged-electrical-equipment/">NEMA 的水損電氣設備指引</a>說明哪些設備須更換，哪些可由受訓人員整修。請遵循設備製造商的說明與現場安全程序。</p>
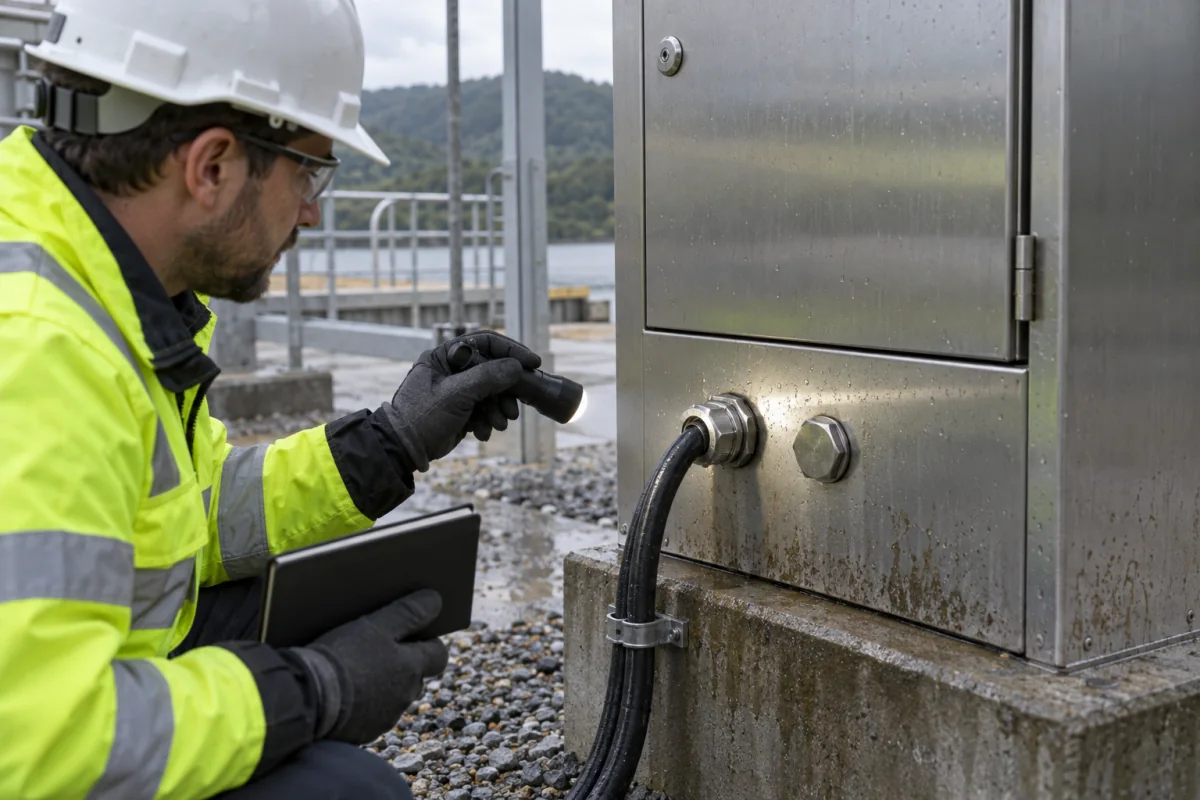
<p>記錄觀察到的水位、持續時間、污染物及內部進水跡象。接著檢查外被、固定頭蓋帽、固定頭本體、壁面密封、面板及鎖緊螺帽。留意密封件移位、切口、裂紋、腐蝕、碎屑、螺紋損傷、箱壁變形，以及電纜支撐件移動。這些檢查結果可指出密封邊界中需要處理的部位。</p>
<figure>
<img alt="技術人員照亮已關閉外殼潮濕外側的電纜密封接頭及其旁已封堵的開口" src="/images/blog/the-engineers-guide-to-deluge-proof-glands-for-extreme-weather-protection/post-weather-exterior-entry-check.webp" srcset="/images/blog/the-engineers-guide-to-deluge-proof-glands-for-extreme-weather-protection/post-weather-exterior-entry-check-600.webp 600w, /images/blog/the-engineers-guide-to-deluge-proof-glands-for-extreme-weather-protection/post-weather-exterior-entry-check.webp 1200w" sizes="(max-width: 640px) 100vw, 1200px" width="1200" height="800" loading="lazy" decoding="async" />
<figcaption>技術人員在外部狀況檢查時，照亮電纜固定頭及附近已封堵的開口。</figcaption>
</figure>
<p>若產品說明要求更換，或零件狀況無法符合驗收準則，就應更換。額外鎖緊可能損壞外被、密封件、螺紋或箱壁。選擇修理、更換或其他引入口配置前，可參考<a href="/zh-hant/blog/application-failure-analysis-why-did-this-cable-gland-leak-and-how-could-it-have-been-prevented/">電纜引入口洩漏診斷指南</a>，追查漏水原因。</p>
<p>若事件的水深、持續時間或化學暴露超出規劃條件，除了受損零件，也要重新評估設計基準。反覆發生的風暴可能改變排水、電纜支撐及表面狀況。將這些變化納入下一次檢查與更換決策。</p>
<h2 id="conclusion">結論</h2>
<p>我會將防洪型電纜固定頭納入完整的天候與洪水防護設計。先確認水位、持續時間及水流路徑。再透過抬高位置、排水及支撐佈線降低暴露，並讓電纜密封、箱壁連接及其他箱體開口符合剩餘工況。</p>
<p>將所選尺寸、材料、配件及安裝方法一併確認。若同時面臨浸水與水柱暴露，應分別列出兩種條件。惡劣天候過後，先評估整套設備，再恢復使用。合適的引入口配置應能配合實際電纜與箱壁、承受規劃的暴露條件，並能安全檢查及維護。</p>
<h2 id="faqs-about-deluge-proof-cable-glands">耐大量水噴淋電纜密封接頭常見問題</h2>
<h3 id="what-immersion-conditions-should-i-specify-for-an-ip68-cable-gland">選擇 IP68 電纜固定頭時，應指定哪些浸水條件？</h3>
<p>指定引入口處的水深或壓力、曝露時間及完整安裝配置。包括電纜直徑與表面狀況、箱壁連接方式、配件及安裝方法。我會將這些條件與所選產品標示的浸水適用範圍比較，包括適用的溫度和液體條件。</p>
<h3 id="does-ip69-replace-an-ip68-immersion-requirement">IP69 是否可取代 IP68 浸沒要求？</h3>
<p>IP69 與 IP68 對應不同的水暴露。IP69 涉及高壓、高溫水柱；IP68 則是在指定條件下的浸沒。若專案同時涉及兩者，應選擇涵蓋兩種條件的配置，並將各自的條件都列入安裝要求。</p>
<h3 id="is-stainless-steel-required-for-a-deluge-proof-gland">防洪型電纜固定頭一定要用不鏽鋼嗎？</h3>
<p>依水質、腐蝕、溫度、紫外線、負載與電氣功能選擇本體和密封材料。不鏽鋼、黃銅及聚合物各自在其規定條件內都可能適用。受污染的洪水也需留意確切的密封膠料、電纜外被及其他暴露部件。</p>
<h3 id="how-should-i-improve-an-existing-entry-that-lacks-the-required-flood-protection">若現有引入口不具備所需防洪能力，應如何改善？</h3>
<p>先檢查實際電纜、壁面密封、開孔和配件。修正允許處理的安裝缺陷，或選擇符合所需浸水工況的替換配置。只有在產品與箱體配置允許時，才加用密封劑、膠帶或不同墊圈；這些額外材料會改變貼合、螺紋咬合和化學接觸。</p>
<h3 id="what-should-happen-after-a-flood-before-equipment-is-energized">設備遭洪水淹浸後，重新送電前應怎麼做？</h3>
<p>具資格的人員應遵循現場的電氣安全及設備復原程序。記錄受水情況並評估整套設備，包括內部水損、電纜外被、固定頭、壁面密封、支撐件及腐蝕。完成所需更換、核准的復原作業及測試後，才能恢復使用。</p>
<h3 id="sources-and-technical-references">來源與技術參考資料</h3>
<ul>
<li><a href="https://webstore.iec.ch/en/publication/2452">IEC 60529:1989+A1:1999+A2:2013《外殼提供的防護等級》</a>，查閱日期：2026-10-29。</li>
<li><a href="https://webstore.iec.ch/en/publication/7034">IEC 62444:2010《電氣安裝用電纜固定頭》</a>，查閱日期：2026-10-29。</li>
<li><a href="https://www.epa.gov/waterutilityresponse/flood-resilience-basic-guide-water-and-wastewater-utilities">US EPA《洪水韌性：水務與污水公用事業基本指南》</a>，查閱日期：2026-10-29。</li>
<li><a href="https://www.beama.org.uk/static/uploaded/40d16894-02a6-40f0-b15e126ffa4f1ccb.pdf">BEAMA《IP 代碼指南》</a>，查閱日期：2026-10-29。</li>
<li><a href="https://www.makeitelectric.org/standards/evaluating-water-damaged-electrical-equipment/">NEMA《水損電氣設備的評估》</a>，查閱日期：2026-10-29。</li>
</ul>