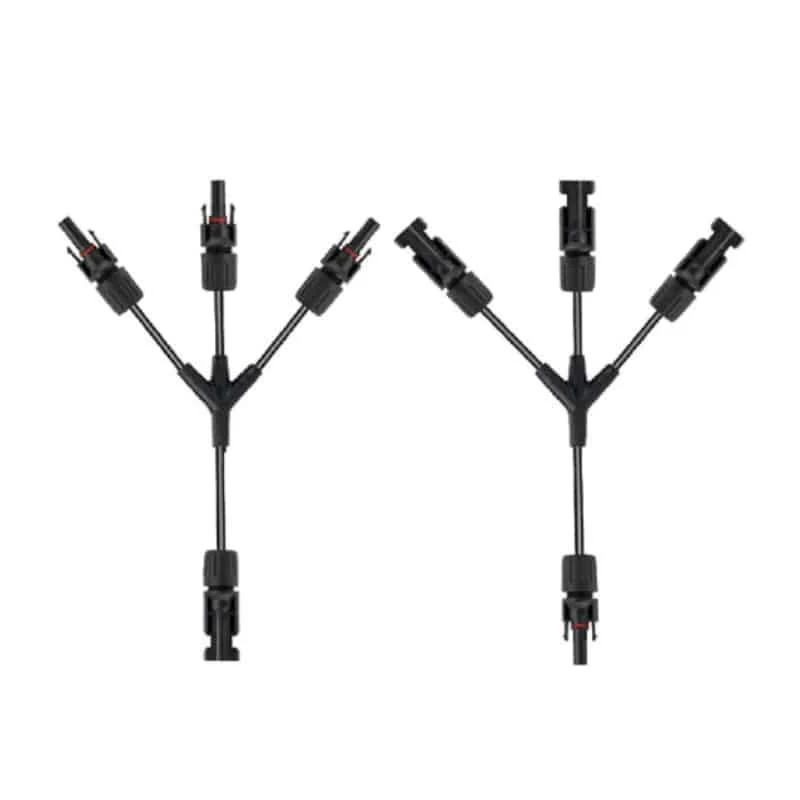
# MC4 分支連接器完整指南（並聯組串用 Y 型連接器）

> Source: https://chinacableglands.com/zh-hant/blog/a-complete-guide-to-mc4-branch-connectors-y-connectors-for-parallel-strings/
> Language: zh-Hant
> Publisher: 倍拓電纜接頭
> Author: Edward Wang
> Published: 2026-03-22
> Updated: 2026-05-03

了解 MC4 分支連接器如何匯合並聯太陽光電組串，以及如何確認電流、電壓、保護、極性、電纜和配接相容性。

<p>MC4 分支連接器會將相容太陽光電組串的正極導線接在一起，並透過另一個分支連接負極導線。我會先追蹤電流在兩個分支中的路徑。選擇零件前，請確認系統電壓、極性、電纜、保護措施及已識別的連接器系統。分支連接器不會讓任意的 4 mm 太陽光電連接器自動相容，也不會替你選擇過電流保護，更不會提高其他零件的額定值。其認證範圍必須涵蓋你預計使用的組件。</p>
<blockquote>
<p><strong>重點摘要</strong></p>
<ul>
<li>並聯組串維持共同的工作電壓，電流則在分支輸出端合併。</li>
<li>應以合併後的電流檢查分支連接器、輸出電纜、下游端子及保護措施，而非只看單一組串的電流。</li>
<li>「MC4」是特定連接器系統的名稱，不是所有外觀相似的 4 mm 太陽光電連接器都適用的通用相容性標準。</li>
<li>除非確切的認證組合明確允許其他搭配，否則應使用同一已識別系統中相互配對的連接器公母端。</li>
<li>不可將不具分斷能力的太陽光電連接器當作帶載開關；解鎖前應先隔離電路並確認其狀態。</li>
</ul>
</blockquote>
<h2 id="what-are-mc4-branch-connectors-and-what-are-they-not">什麼是 MC4 分支連接器？它又不代表什麼？</h2>
<p>一個 <strong>MC4 分支連接器</strong>會將兩組或更多太陽光電組串中極性相同的導線接至同一輸出路徑。相互配對的正極和負極分支會維持極性分離。連接埠數量只說明電路配置，無法據此判定電流、電壓、電纜尺寸、環境額定、配接系統或認證。</p>
<p><strong>跨廠牌配接</strong>是將不同製造商或不同系統的插頭與插座接在一起。「MC4」不能證明所有外觀相似的 4 mm 太陽光電連接器都相容。NLR 的<a href="https://research-hub.nlr.gov/en/publications/standardized-nomenclature-for-photovoltaic-connectors-article-no-/">太陽光電連接器標準化命名資料</a>說明了「MC4 相容」、跨廠牌配接及公母端標示可能造成的誤解。</p>
<p>要可靠辨識此連接，確認極性及兩個配接零件的料號，比查看外殼外觀更有效。接點、密封件、導線適用範圍、電纜外徑及工具也都必須符合同一連接器系統；即使一對零件能扣合，仍可能不是合適的組合。</p>
<p><a href="/zh-hant/resource-center/cable-entry-glossary/#often-confused">連接器術語章節</a>有助於讓電路圖和安裝紀錄中的插頭、插座、正極、負極、接點及密封件標示保持一致。術語無法證明相容性，但能避免誤認實體半件、電路極性或配接主張。</p>
<p><a href="https://webstore.iec.ch/en/publication/66763">IEC 62852:2014+A1:2020 合併版本</a>涵蓋直流太陽光電電路用連接器。其範圍包括可在帶電狀態下插接或拔開、但不具分斷能力的連接器。這類連接器不會因此自動成為能切斷負載電流的開關。</p>
<p>請依據文件所載的電流、電壓、電纜、配接、溫度及安裝條件使用。除非系統已針對此工作狀態完成設計並取得核准，否則不可在帶載時拔開連接器。</p>
<h2 id="what-changes-electrically-when-pv-strings-are-connected-in-parallel">太陽光電組串並聯時，電氣特性會如何改變？</h2>
<p><strong>並聯太陽光電組串</strong>是多條由模組串聯而成的組串之一，各組串連接至共同的正極與負極節點。並聯組串共享工作電壓，電流則在輸出端合併。雙輸入分支不會讓組串電壓加倍；它會將兩條正極接入一個分支，並將兩條負極接入配對的另一個分支。</p>
<p>先計算每個輸出的組串數量，再依適用方法設定最大設計電流，並檢查該節點之後串聯路徑中的每個零件。<a href="https://webstore.iec.ch/en/publication/110893">IEC 62548-1:2023+A1:2025 陣列設計範圍</a>涵蓋直流配線、保護裝置、開關及接地。分支連接器無法取代對輸出導線、保護措施、隔離開關、逆變器輸入或匯流箱的檢查。</p>
<p>若分支輸出由 <span class="article-math article-math-inline" data-latex="n"><span class="katex"><math xmlns="http://www.w3.org/1998/Math/MathML"><semantics><mrow><mi>n</mi></mrow><annotation encoding="application/x-tex">n</annotation></semantics></math></span></span> 組組串供電，先計算未調整的電流總和：</p>
<div class="article-math article-math-display" data-latex="I_{\mathrm{branch}} = \sum_{k=1}^{n} I_{\mathrm{string},k}"><span class="katex"><math xmlns="http://www.w3.org/1998/Math/MathML" display="block"><semantics><mrow><msub><mi>I</mi><mrow><mi mathvariant="normal">b</mi><mi mathvariant="normal">r</mi><mi mathvariant="normal">a</mi><mi mathvariant="normal">n</mi><mi mathvariant="normal">c</mi><mi mathvariant="normal">h</mi></mrow></msub><mo>=</mo><munderover><mo>∑</mo><mrow><mi>k</mi><mo>=</mo><mn>1</mn></mrow><mi>n</mi></munderover><msub><mi>I</mi><mrow><mrow><mi mathvariant="normal">s</mi><mi mathvariant="normal">t</mi><mi mathvariant="normal">r</mi><mi mathvariant="normal">i</mi><mi mathvariant="normal">n</mi><mi mathvariant="normal">g</mi></mrow><mo separator="true">,</mo><mi>k</mi></mrow></msub></mrow><annotation encoding="application/x-tex">I_{\mathrm{branch}} = \sum_{k=1}^{n} I_{\mathrm{string},k}</annotation></semantics></math></span></div>
<p>其中，<span class="article-math article-math-inline" data-latex="I_{\mathrm{string},k}"><span class="katex"><math xmlns="http://www.w3.org/1998/Math/MathML"><semantics><mrow><msub><mi>I</mi><mrow><mrow><mi mathvariant="normal">s</mi><mi mathvariant="normal">t</mi><mi mathvariant="normal">r</mi><mi mathvariant="normal">i</mi><mi mathvariant="normal">n</mi><mi mathvariant="normal">g</mi></mrow><mo separator="true">,</mo><mi>k</mi></mrow></msub></mrow><annotation encoding="application/x-tex">I_{\mathrm{string},k}</annotation></semantics></math></span></span> 是指派給第 <span class="article-math article-math-inline" data-latex="k"><span class="katex"><math xmlns="http://www.w3.org/1998/Math/MathML"><semantics><mrow><mi>k</mi></mrow><annotation encoding="application/x-tex">k</annotation></semantics></math></span></span> 組組串的設計電流，<span class="article-math article-math-inline" data-latex="I_{\mathrm{branch}}"><span class="katex"><math xmlns="http://www.w3.org/1998/Math/MathML"><semantics><mrow><msub><mi>I</mi><mrow><mi mathvariant="normal">b</mi><mi mathvariant="normal">r</mi><mi mathvariant="normal">a</mi><mi mathvariant="normal">n</mi><mi mathvariant="normal">c</mi><mi mathvariant="normal">h</mi></mrow></msub></mrow><annotation encoding="application/x-tex">I_{\mathrm{branch}}</annotation></semantics></math></span></span> 是進入共用輸出路徑的電流總和。若三組組串的設計電流均為 <span class="article-math article-math-inline" data-latex="I_s"><span class="katex"><math xmlns="http://www.w3.org/1998/Math/MathML"><semantics><mrow><msub><mi>I</mi><mi>s</mi></msub></mrow><annotation encoding="application/x-tex">I_s</annotation></semantics></math></span></span>，則總和為 <span class="article-math article-math-inline" data-latex="I_{\mathrm{branch}} = 3 I_s"><span class="katex"><math xmlns="http://www.w3.org/1998/Math/MathML"><semantics><mrow><msub><mi>I</mi><mrow><mi mathvariant="normal">b</mi><mi mathvariant="normal">r</mi><mi mathvariant="normal">a</mi><mi mathvariant="normal">n</mi><mi mathvariant="normal">c</mi><mi mathvariant="normal">h</mi></mrow></msub><mo>=</mo><mn>3</mn><msub><mi>I</mi><mi>s</mi></msub></mrow><annotation encoding="application/x-tex">I_{\mathrm{branch}} = 3 I_s</annotation></semantics></math></span></span>。這只是拓樸結果，不能直接當作最終電纜或 OCPD 額定值。請依適用的陣列設計方法及必要的環境或安裝係數進行調整，再將所得負荷與連接器、輸出電纜、端子、保護裝置及設備輸入端比較。</p>
<figure class="blog-chart" style="container-type: inline-size;">
<svg xmlns="http&#58;//www.w3.org/2000/svg" viewBox="0 0 480 850" role="img" aria-labelledby="cg-pv-branch-title cg-pv-branch-desc" style="font-family:var(--font-body); width: 100% !important; max-width: 100% !important; height: auto !important;" id="cg-typography-fd82ab69d6dc0f22">
<style>
#cg-typography-fd82ab69d6dc0f22 { --svg-body-screen: 17px; }
@media (max-width: 760px) { #cg-typography-fd82ab69d6dc0f22 { --svg-body-screen: 16px; } }
</style>
<title id="cg-pv-branch-title">並聯太陽光電組串的分支拓樸與額定值界線</title>
<desc id="cg-pv-branch-desc">三組太陽光電組串分別接至正極與負極分支節點。兩個輸出都通往下游設備。合併後的路徑必須檢查相容性、電流、電壓、保護、極性及安裝條件。</desc>
<style>.cg-box{fill:var(--surface-card);stroke:var(--color-graphite);stroke-width:2}.cg-head{fill:var(--color-carbon);font-weight:700}.cg-copy{fill:var(--color-graphite)}.cg-pos{fill:none;stroke:var(--color-primary);stroke-width:4}.cg-neg{fill:none;stroke:var(--color-graphite);stroke-width:4}</style>
<text x="240" y="42" class="cg-head" font-size="20" style="font-size: calc(22px * 480px / 100cqw) !important;" text-anchor="middle">並聯太陽光電分支拓樸。</text>
<path d="M32 82H172V136H32ZM32 166H172V220H32ZM32 250H172V304H32ZM272 130H448V210H272ZM272 250H448V330H272ZM32 430H448V652H32Z" class="cg-box"/>
<text x="102" y="116" class="cg-head" font-size="20" style="font-size: calc(16px * 480px / 100cqw) !important;" text-anchor="middle">組串 A。<tspan x="102" dy="84" font-size="20" style="font-size: calc(16px * 480px / 100cqw) !important;">組串 B。</tspan><tspan x="102" dy="84" font-size="20" style="font-size: calc(16px * 480px / 100cqw) !important;">組串 C。</tspan></text>
<path d="M172 94H220V146H272M172 178H208V162H272M172 262H196V178H272" class="cg-pos"/>
<path d="M172 120H196V266H272M172 204H208V282H272M172 288H220V298H272" class="cg-neg"/>
<text x="360" y="162" text-anchor="middle" class="cg-head" font-size="20" style="font-size: calc(18px * 480px / 100cqw) !important;">正極<tspan x="360" dy="30" font-size="20" style="font-size: calc(18px * 480px / 100cqw) !important;">分支。</tspan><tspan x="360" dy="90" font-size="20" style="font-size: calc(18px * 480px / 100cqw) !important;">負極</tspan><tspan x="360" dy="30" font-size="20" style="font-size: calc(18px * 480px / 100cqw) !important;">分支。</tspan></text>
<path d="M448 170H460V402H136V430" class="cg-pos"/>
<path d="M448 290H472V414H344V430" class="cg-neg"/>
<text x="240" y="460" class="cg-head" font-size="20" style="font-size: calc(var(--svg-body-screen) * 480px / 100cqw) !important;" text-anchor="middle"><tspan style="font-size: calc(18px * 480px / 100cqw) !important;">下游</tspan><tspan x="240" dy="30" font-size="20" style="font-size: calc(18px * 480px / 100cqw) !important;">輸入端。</tspan><tspan x="240" dy="38" class="cg-copy" font-size="18" style="font-size: calc(var(--svg-body-screen) * 480px / 100cqw) !important;">系統電壓。</tspan><tspan x="240" dy="28" class="cg-copy" font-size="18" style="font-size: calc(var(--svg-body-screen) * 480px / 100cqw) !important;">合併電流。</tspan><tspan x="240" dy="28" class="cg-copy" font-size="18" style="font-size: calc(var(--svg-body-screen) * 480px / 100cqw) !important;">輸入端與 OCPD</tspan><tspan x="240" dy="28" class="cg-copy" font-size="18" style="font-size: calc(var(--svg-body-screen) * 480px / 100cqw) !important;">限制。</tspan></text>
<path d="M32 682H448" class="cg-neg"/>
<text x="44" y="722" class="cg-copy" font-size="18" style="font-size: calc(var(--svg-body-screen) * 480px / 100cqw) !important;">1 同一連接器系統。<tspan x="44" dy="32" font-size="18" style="font-size: calc(var(--svg-body-screen) * 480px / 100cqw) !important;">2 分支、電纜與端子。</tspan></text>
<text x="44" y="786" class="cg-copy" font-size="18" style="font-size: calc(var(--svg-body-screen) * 480px / 100cqw) !important;">3 逆向電流與 OCPD。<tspan x="44" dy="32" font-size="18" style="font-size: calc(var(--svg-body-screen) * 480px / 100cqw) !important;">4 極性、鎖定與檢查。</tspan></text>
</svg>
<figcaption>正極與負極組串分別在獨立分支中合併，再接至下游輸入端。沿著合併電流的路徑逐項檢查連接器相容性、電纜與端子額定值、逆向電流、過電流保護、極性、鎖定及安裝方式。</figcaption>
</figure>
<p>對於三組組串的分支，我會將審查分成四個步驟。</p>
<p>首先，畫出每個正極與負極來源，並標示共用節點。辨識分支和輸出零件。這就是電路拓樸，能顯示電流在哪裡合併。</p>
<p>接著依專案設計方法設定分支數量、最大電流與電壓、逆向電流保護，以及任何過電流保護裝置（OCPD）的位置。也要檢查下游設備限制，藉此確定電氣負荷。</p>
<p>沿著已調整的合併電流路徑，依序檢查輸出接點、導線、端子、隔離開關、保護裝置及設備輸入端。將每組配接零件與連接器系統紀錄核對。這些紀錄可確認額定值及相容性。</p>
<p>最後，依照接點、密封件、導線範圍、電纜直徑、工具及鎖定方式的組裝說明施工。這些說明規定了所選組件的組裝方式。</p>
<p>即使外殼可以接合，我仍會先檢查組串設計，再連接分支。確認極性、模組數量、開路電壓特性及工作電壓範圍；適用時也要檢查方向或最大功率點追蹤（MPPT）配置，並遵守設備製造商的輸入規則。來源特性不匹配可能造成環流或逆向電流，並使工作點偏移。分支連接器無法修正這些差異。</p>
<figure>
<picture>
<source media="(max-width: 640px)" srcset="/images/blog/a-complete-guide-to-mc4-branch-connectors-y-connectors-for-parallel-strings/pv-branch-topology-check-600.webp">
<img alt="三個電源盒的紅色與黑色電纜分別經過兩個分支本體，並接入打開的訓練用外殼" src="/images/blog/a-complete-guide-to-mc4-branch-connectors-y-connectors-for-parallel-strings/pv-branch-topology-check.webp" width="1200" height="800" loading="lazy" decoding="async">
</picture>
<figcaption>三個電源盒的紅色與黑色電纜分別通過兩個有支撐的分支本體；兩個輸出經不同的外殼入口延伸至封帽隔離、尚未連接的電纜端。</figcaption>
</figure>
<p>從電源盒開始，沿著每條紅色和黑色電纜追蹤至指定分支及輸出端。接著我會將連接埠數量、共用節點和目的端與受控電路圖比對。依據核准設計、零件紀錄及規定測試，確認極性、導線負荷、OCPD 選擇、連接器相容性及電氣狀態。</p>
<h2 id="where-must-combined-current-and-reverse-current-be-checked">哪些位置必須檢查合併電流和逆向電流？</h2>
<p>合併電流檢查從分支內部接點開始，並沿著輸出接點、輸出導線、後續分支、匯流箱端子、隔離開關、保護裝置及逆變器或其他電力轉換設備的輸入端一路進行。每個零件都必須具有適用於實際直流負荷和安裝條件的額定值。不可只憑連接埠數量，就核准 2-to-1、3-to-1 或 4-to-1 配置。</p>
<table>
<thead>
<tr>
<th>設計項目</th>
<th>必要證據</th>
<th>常見錯誤捷徑</th>
</tr>
</thead>
<tbody>
<tr>
<td>每個來源組串</td>
<td>設計電流、導線額定值、模組串聯最大保險絲額定值或逆向電流限制</td>
<td>只看銘牌工作電流。</td>
</tr>
<tr>
<td>分支連接器</td>
<td>確切型號、接點與電纜組合、直流電流及電壓額定值、溫度限制</td>
<td>假設每個連接埠只承載單一組串電流。</td>
</tr>
<tr>
<td>合併輸出導線</td>
<td>導線截面積、絕緣、電纜外徑、安裝方式、成束及溫度係數</td>
<td>未檢查合併負荷便沿用來源組串的電纜規格。</td>
</tr>
<tr>
<td>下游設備</td>
<td>端子與輸入限制、允許的組串數、MPPT 配置、極性</td>
<td>把連接器當成輸入擴充器。</td>
</tr>
<tr>
<td>逆向電流保護</td>
<td>故障電流來源、模組限制、是否需要 OCPD、額定值、位置及分斷負荷</td>
<td>假設分支連接器會提供保護。</td>
</tr>
<tr>
<td>隔離</td>
<td>直流隔離方式及已確認的無電狀態</td>
<td>以拔開連接器的方式切斷負載電流。</td>
</tr>
</tbody>
</table>
<p><strong>逆向電流</strong>是由其他並聯電源或相連設備流入某個電源電路的電流。選擇組串保護措施前，應先評估逆向電流。是否需要過電流保護裝置、其額定值及位置，取決於電源、模組限制、導線載流量及可用故障電流。載流量是導線在其安裝條件下允許承載的電流。當地規定及設備說明同樣適用。</p>
<p>IEC 62548-1 將電氣保護納入陣列設計。未受保護的分支外殼不會提供保險絲、隔離、逆向電流阻斷或電弧故障保護。只有在零件另行取得該功能的認證時，才能將它用於這些用途。</p>
<p>系統電壓也必須單獨檢查。並聯不會將組串電壓相加，但分支仍會承受可能出現的最大直流電壓。兩組並聯組串仍須依來源組串相同的低溫條件檢查電壓。</p>
<p>依設計標準及模組資料確認最大電壓、暫態電壓和設備限制，並與分支組件及配接零件比較。電流檢查通過，並不能消除電壓額定值不足的問題。</p>
<h2 id="why-is-cross-mating-a-separate-compatibility-decision">為什麼跨廠牌配接必須另外判斷相容性？</h2>
<p>即使接點、公差、彈簧力、密封件、電纜夾持、工具和測試範圍各不相同，外殼仍可能扣合。實體上接得起來，不能證明電氣或認證相容性。</p>
<p>NLR 的<a href="https://research-hub.nlr.gov/en/publications/creating-a-universal-pv-plug-and-socket-standard/">建立通用太陽光電插頭與插座標準</a>指出，IEC 62852 和 UL 6703 的認證對象是同一製造商的連接器，且禁止不同製造商的連接器互相配接。模組、延長線、分支、匯流箱引線及設備導線應採用同一已識別系統。</p>
<p>若計畫混用不同零件，應要求證據明確列出兩個半件和認證組合。「MC4 相容」、相同插銷直徑、手動試接或泛稱標準，都不足以作為證明。具備文件依據的轉接線組可能有幫助，但仍須檢查每一個新增端接。</p>
<p>若是美國專案，我會先確認採用的電氣法規版本及設備說明，再釐清認證途徑和管轄機關（負責接受該安裝的單位）。只寫「UL」無法回答這些問題。官方 <a href="https://www.nfpa.org/codes-and-standards/nfpa-70-standard-for-electrical-installations/70">NFPA 70 國家電氣法規頁面</a>提供法規內容，但不是分支連接器的認證紀錄。</p>
<p>請在負責認證機構的現行資料庫中查找產品類別、檔案和型號，並確認電纜組合、額定值及允許的配接零件。商城標誌、供應商聲明或相似系列的登錄資料，都不能代表實際供應的組件。</p>
<p>在負責機構的資料庫中查核確切連接器系統紀錄前，<a href="/zh-hant/resource-center/global-market-access/">全球市場准入指南</a>可協助釐清目的地標準、認證制度及市場規則。該指南不能取代受控的認證紀錄。</p>
<figure>
<img alt="白色背景上的兩組黑色太陽光電一分三分支連接器組件" src="/images/blog/a-complete-guide-to-mc4-branch-connectors-y-connectors-for-parallel-strings/parallel-branch-connector-form.webp" width="800" height="800" loading="lazy" decoding="async">
<figcaption>兩組一分三太陽光電分支連接器組件，每組都以三條引線匯接至一條輸出線。</figcaption>
</figure>
<p>將此類外形納入設計前，應先確認確切料號、配接系統、電流與電壓額定值、電纜範圍、防護等級及證書紀錄。</p>
<h2 id="branch-topology-and-connector-system-selection">分支拓樸與連接器系統選擇</h2>
<p>我會先定義陣列電路，再選擇分支配置。若少數相符的組串要接至允許並聯的輸入端，精簡的 Y 型分支可能合適。若設計需要個別組串保險絲、監測、隔離、突波保護、維修通道、電纜轉接或多個並聯電源，匯流箱或配線線組可能更合適。連接器數量應由這些需求決定。</p>
<figure class="blog-chart" style="container-type: inline-size;">
<svg id="mc4-branch-architecture-selection-inline" xmlns="http://www.w3.org/2000/svg" viewBox="0 0 480 874" role="img" aria-labelledby="mc4-branch-title mc4-branch-desc" font-family="Arial, Helvetica, sans-serif" style="width: 100% !important; max-width: 100% !important; height: auto !important;">
<style>
#mc4-branch-architecture-selection-inline { --svg-body-screen: 17px; }
@media (max-width: 760px) { #mc4-branch-architecture-selection-inline { --svg-body-screen: 16px; } }
</style>
<title id="mc4-branch-title">選擇直接配對的太陽光電分支，或採用匯流箱／配線線組</title>
<desc id="mc4-branch-desc">垂直決策樹從已定義的電氣節點及配對的正極、負極路徑開始。若組串相符且下游輸入允許直接分支，則採用直接配對分支；若需要個別功能或多個電源，則選擇匯流箱或配線線組。無論採用哪種配置，都要檢查下游極性、電壓、設計電流、逆向電流、系統和電纜需求，以及安裝說明。</desc>
<style>
#mc4-branch-architecture-selection-inline{--mc4-bg:#FFFFFF;--mc4-text:#18352B;--mc4-muted:#385248;--mc4-rule:#A9C9BB;--mc4-panel:#ECF4EF;--mc4-soft:#F7FAF8;--mc4-direct:#E5F4EC;--mc4-warm-panel:#FFF2DF;--mc4-green:#078455;--mc4-amber:#B96E16}
:root[data-theme="dark"] #mc4-branch-architecture-selection-inline{--mc4-bg:#101915;--mc4-text:#EAF4EF;--mc4-muted:#C7D4CE;--mc4-rule:#507466;--mc4-panel:#203129;--mc4-soft:#17241E;--mc4-direct:#173325;--mc4-warm-panel:#332714;--mc4-green:#4CDDA5;--mc4-amber:#FBBF69}
</style>
<defs>
<marker id="mc4-branch-green-arrow" viewBox="0 0 10 10" markerWidth="11" markerHeight="11" refX="9" refY="5" markerUnits="userSpaceOnUse" orient="auto"><path d="M0 0L10 5L0 10Z" fill="var(--mc4-green)"/></marker>
<marker id="mc4-branch-amber-arrow" viewBox="0 0 10 10" markerWidth="11" markerHeight="11" refX="9" refY="5" markerUnits="userSpaceOnUse" orient="auto"><path d="M0 0L10 5L0 10Z" fill="var(--mc4-amber)"/></marker>
</defs>
<rect width="480" height="874" fill="var(--mc4-bg)"/>
<text x="24" y="40" fill="var(--mc4-text)" font-size="23" font-weight="700" style="font-size: calc(22px * 480px / 100cqw) !important;">選擇太陽光電分支</text>
<text x="24" y="70" fill="var(--mc4-text)" font-size="23" font-weight="700" style="font-size: calc(22px * 480px / 100cqw) !important;">再確認連接器細節</text>
<text x="24" y="101" fill="var(--mc4-muted)" font-size="16" style="font-size: calc(var(--svg-body-screen) * 480px / 100cqw) !important;">保持正極與負極路徑成對。</text>
<path d="M24 120H456" fill="none" stroke="var(--mc4-rule)" stroke-width="2"/>
<rect x="24" y="134" width="432" height="116" rx="13" fill="var(--mc4-panel)" stroke="#78988B" stroke-width="2.5"/>
<text x="43" y="165" fill="var(--mc4-text)" font-size="19" font-weight="700" style="font-size: calc(18px * 480px / 100cqw) !important;">定義電氣節點</text>
<circle cx="54" cy="192" r="11" fill="#078455"/>
<text x="49" y="198" fill="#FFFFFF" font-size="16" font-weight="700" style="font-size: calc(16px * 480px / 100cqw) !important;">+</text>
<path d="M69 192H238" fill="none" stroke="var(--mc4-green)" stroke-width="4" stroke-linecap="round"/>
<text x="257" y="198" fill="var(--mc4-text)" font-size="16" style="font-size: calc(16px * 480px / 100cqw) !important;">正極路徑</text>
<circle cx="54" cy="224" r="11" fill="#FFFFFF" stroke="var(--mc4-text)" stroke-width="2"/>
<text x="49" y="230" fill="#18352B" font-size="16" font-weight="700" style="font-size: calc(16px * 480px / 100cqw) !important;">−</text>
<path d="M69 224H238" fill="none" stroke="var(--mc4-text)" stroke-width="4" stroke-linecap="round"/>
<text x="257" y="230" fill="var(--mc4-text)" font-size="16" style="font-size: calc(16px * 480px / 100cqw) !important;">負極路徑</text>
<path d="M240 251V271" fill="none" stroke="var(--mc4-green)" stroke-width="3" marker-end="url(#mc4-branch-green-arrow)"/>
<path d="M240 277L443 344L240 411L37 344Z" fill="var(--mc4-soft)" stroke="#78988B" stroke-width="3"/>
<text x="240" y="336" text-anchor="middle" fill="var(--mc4-text)" font-size="19" font-weight="700" style="font-size: calc(18px * 480px / 100cqw) !important;">是否需要額外功能</text>
<text x="240" y="361" text-anchor="middle" fill="var(--mc4-text)" font-size="19" font-weight="700" style="font-size: calc(18px * 480px / 100cqw) !important;">或多個電源？</text>
<path d="M127 382L127 440" fill="none" stroke="var(--mc4-green)" stroke-width="3" marker-end="url(#mc4-branch-green-arrow)"/>
<text x="68" y="425" fill="var(--mc4-green)" font-size="16" font-weight="700" style="font-size: calc(16px * 480px / 100cqw) !important;">否</text>
<path d="M353 382L353 440" fill="none" stroke="var(--mc4-amber)" stroke-width="3" marker-end="url(#mc4-branch-amber-arrow)"/>
<text x="392" y="425" fill="var(--mc4-amber)" font-size="16" font-weight="700" style="font-size: calc(16px * 480px / 100cqw) !important;">是</text>
<rect x="24" y="448" width="206" height="188" rx="13" fill="var(--mc4-direct)" stroke="var(--mc4-green)" stroke-width="2.5"/>
<text x="42" y="480" fill="var(--mc4-text)" font-size="18" font-weight="700" style="font-size: calc(18px * 480px / 100cqw) !important;">直接分支</text>
<text x="42" y="512" fill="var(--mc4-text)" font-size="16" style="font-size: calc(var(--svg-body-screen) * 480px / 100cqw) !important;">相符的組串</text>
<text x="42" y="537" fill="var(--mc4-text)" font-size="16" style="font-size: calc(16px * 480px / 100cqw) !important;">允許的輸入端</text>
<circle cx="54" cy="581" r="10" fill="#078455"/>
<text x="49" y="587" fill="#FFFFFF" font-size="16" font-weight="700" style="font-size: calc(16px * 480px / 100cqw) !important;">+</text>
<path d="M68 581H210" fill="none" stroke="var(--mc4-green)" stroke-width="4" stroke-linecap="round"/>
<circle cx="54" cy="612" r="10" fill="#FFFFFF" stroke="var(--mc4-text)" stroke-width="2"/>
<text x="49" y="618" fill="#18352B" font-size="16" font-weight="700" style="font-size: calc(16px * 480px / 100cqw) !important;">−</text>
<path d="M68 612H210" fill="none" stroke="var(--mc4-text)" stroke-width="4" stroke-linecap="round"/>
<rect x="250" y="448" width="206" height="188" rx="13" fill="var(--mc4-warm-panel)" stroke="var(--mc4-amber)" stroke-width="2.5"/>
<text x="268" y="480" fill="var(--mc4-text)" font-size="18" font-weight="700" style="font-size: calc(18px * 480px / 100cqw) !important;">匯流箱或</text>
<text x="268" y="504" fill="var(--mc4-text)" font-size="18" font-weight="700" style="font-size: calc(18px * 480px / 100cqw) !important;">配線線組</text>
<text x="268" y="537" fill="var(--mc4-text)" font-size="16" style="font-size: calc(16px * 480px / 100cqw) !important;">個別功能</text>
<text x="268" y="560" fill="var(--mc4-text)" font-size="16" style="font-size: calc(16px * 480px / 100cqw) !important;">多個電源</text>
<circle cx="280" cy="581" r="10" fill="#078455"/>
<text x="275" y="587" fill="#FFFFFF" font-size="16" font-weight="700" style="font-size: calc(16px * 480px / 100cqw) !important;">+</text>
<path d="M294 581H436" fill="none" stroke="var(--mc4-green)" stroke-width="4" stroke-linecap="round"/>
<circle cx="280" cy="612" r="10" fill="#FFFFFF" stroke="var(--mc4-text)" stroke-width="2"/>
<text x="275" y="618" fill="#18352B" font-size="16" font-weight="700" style="font-size: calc(16px * 480px / 100cqw) !important;">−</text>
<path d="M294 612H436" fill="none" stroke="var(--mc4-text)" stroke-width="4" stroke-linecap="round"/>
<path d="M127 638V668H240M353 638V668H240" fill="none" stroke="#78988B" stroke-width="3" stroke-dasharray="7 5"/>
<path d="M240 668V696" fill="none" stroke="var(--mc4-green)" stroke-width="3" marker-end="url(#mc4-branch-green-arrow)"/>
<rect x="24" y="705" width="432" height="143" rx="13" fill="var(--mc4-soft)" stroke="#78988B" stroke-width="2.5"/>
<text x="43" y="739" fill="var(--mc4-text)" font-size="19" font-weight="700" style="font-size: calc(18px * 480px / 100cqw) !important;">確認下游輸入端</text>
<text x="43" y="771" fill="var(--mc4-muted)" font-size="16" style="font-size: calc(var(--svg-body-screen) * 480px / 100cqw) !important;">極性、電壓、設計電流</text>
<text x="43" y="799" fill="var(--mc4-muted)" font-size="16" style="font-size: calc(var(--svg-body-screen) * 480px / 100cqw) !important;">逆向電流、系統、電纜</text>
<text x="43" y="827" fill="var(--mc4-muted)" font-size="16" style="font-size: calc(var(--svg-body-screen) * 480px / 100cqw) !important;">安裝說明</text>
</svg>
<figcaption>若相符組串的節點允許直接分支，便可採用成對的直接分支；若需要個別保險絲、監測、隔離、突波保護、維修通道或多個電源，設計則可能需要改用匯流箱或配線線組。</figcaption>
</figure>
<p>依照以下順序進行：</p>
<ol>
<li><strong>定義電氣節點。</strong> 確認哪些組串共用一個 MPPT 或直流輸入端，並確認設備允許預定的並聯接法。</li>
<li><strong>確定極性和分支數量。</strong> 分別畫出正極與負極路徑，並納入每個中間分支及轉接器。</li>
<li><strong>確認最大電壓和設計電流。</strong> 納入環境修正及適用的陣列設計方法，不要自行套用非正式安全係數。</li>
<li><strong>處理逆向電流保護。</strong> 將可用逆向電流與模組、電纜、連接器及設備限制比較；只有依適用設計規則才能選擇 OCPD。</li>
<li><strong>選定一種連接器系統。</strong> 記錄製造商、系列、正負極料號、接點、密封件、電纜範圍及核准的配接組合。</li>
<li><strong>配對電纜。</strong> 檢查導體材料和截面積、電纜外徑、絕緣、溫度負荷、佈線、彎曲控制及每個連接器入口處的應力。</li>
<li><strong>檢查安裝和認證證據。</strong> 確認工具、剝線長度、壓接模具、組裝扭矩或接合方式、鎖定指示、釋放方法、環境條件及確切證書範圍。</li>
</ol>
<p>依適用的太陽光電陣列設計方法、模組資料、設備說明和管轄區要求，統整組串電流、逆向電流、OCPD 及最大電壓。彎曲半徑和電壓降計算應視為不同的電纜檢查項目。</p>
<h2 id="installation-and-field-inspection-checks">安裝與現場檢查項目</h2>
<p>安裝時應使用已識別的連接器系統，並遵循其文件所載的組裝程序。我會先檢查零件識別、電纜準備、接點壓接、完全配接和鎖定，再檢視應力消除、佈線、支撐、保護及隔離。外觀整齊無法證明使用了正確的壓接模具，也無法證明已扣合的兩個半件屬於同一系統。</p>
<figure>
<picture>
<source media="(max-width: 640px)" srcset="/images/blog/a-complete-guide-to-mc4-branch-connectors-y-connectors-for-parallel-strings/pv-branch-support-inspection-600.webp">
<img alt="太陽光電模組框架下方的專用支架承托兩個分支連接器本體；電纜分別固定，並將已封帽的尾端分開放置" src="/images/blog/a-complete-guide-to-mc4-branch-connectors-y-connectors-for-parallel-strings/pv-branch-support-inspection.webp" width="1200" height="800" loading="lazy" decoding="async">
</picture>
<figcaption>兩個分支本體放在短模組框架下方的專用支架內；每條電纜支線都有獨立固定夾，遠端尾線則分別停放在帶封帽的固定座中。</figcaption>
</figure>
<p>我會利用這個治具檢查每個分支本體下方的支撐，以及各入口處的直線電纜段。也要檢查固定夾位置、彎曲餘量、與框架邊緣的間距及操作空間。接著依照規定的說明、檢查方法和專案紀錄，確認配接零件、接合狀態、壓接紀錄、抗拉及環境要求，以及電氣狀態。</p>
<p>NLR 的研究紀錄<a href="https://research-hub.nlr.gov/en/publications/photovoltaic-cable-connectors-a-comparative-assessment-of-the-pre/">太陽光電電纜連接器：產業現況比較評估</a>說明研究人員如何運用攝影、電阻與電流掃描、X 光電腦斷層、剖面切片、顯微鏡及材料分析檢查現場和加速測試試樣。這項研究說明目視檢查雖有用，但並不完整。現場驗收應結合外觀狀況、可追溯零件、組裝紀錄、適當的電氣測試及確切的製造商說明。</p>
<p>送電前，依據圖面確認每個來源及合併輸出的極性。檢查是否完全接合並鎖定，未使用的連接埠則依說明處理。</p>
<p>支撐電纜時，不要拉扯或扭轉分支。組件應遠離積水和可能造成損壞的邊緣。佈線也必須將移動、磨耗、污染和熱暴露控制在文件規定的限制內。</p>
<p>維護時，應使用指定的直流隔離裝置並遵循現場安全作業程序。使用指定工具解鎖連接器前，先確認所需的電氣狀態。交流側隔離開關已斷開，並不代表陽光照射下的直流危害已消除。</p>
<p>對於裂損、變色、變形、受污染、僅部分扣合或無法識別的零件，應依工程師及製造商的拒收準則處理。只有在說明允許時，才能清潔、重新壓接、重複使用或替換接點。</p>
<p><a href="/zh-hant/resource-center/cable-entry-glossary/">電纜引入詞彙表</a>區分插頭、插座、正極、負極、壓接接點、鎖定零件及電纜密封件等術語。用詞清楚，有助於故障排除時辨認發生故障的介面：即使外殼看起來相似，極性錯誤、密封件損壞與壓接不良也需要不同的修正方式。</p>
<h2 id="conclusion">結論</h2>
<p>並聯太陽光電組串以共同電壓運作，電流則在分支輸出端合併。我會先計算合併後的負荷，再檢查下游每個連接器接點、輸出電纜、端子、保護裝置、隔離開關及設備輸入端。審查時應採用適用的設計方法及實際安裝條件。分支外殼不會提供逆向電流保護，也不會提高其他零件的額定值。</p>
<p>分支及其配接半件應採用同一已識別且取得認證的連接器系統。若要採用指定的混合組合，確切認證必須明確許可。我會接著遵照電纜、接點、工具、極性、鎖定、佈線和隔離說明施工。連接器接得上，不代表彼此相容。驗收外觀整齊的安裝前，應先確認電流路徑及組裝紀錄。</p>
<h2 id="faqs-mc4-branch-connectors">常見問題：MC4 分支連接器</h2>
<h3 id="can-i-mix-mc4-style-branch-connectors-from-different-manufacturers">可以混用不同製造商的 MC4 型分支連接器嗎？</h3>
<p>不可只憑外觀或「MC4 相容」的說法混用連接器。應採用同一已識別的連接器系統及核准的配接零件。只有在現行證據明確列出兩個半件，並確認該認證組合適用於所需電纜、額定值和條件時，才可接受混合配對。僅能實體接合並不是相容性證據。</p>
<h3 id="does-a-2-to-1-y-connector-double-pv-string-voltage">2-to-1 的 Y 型連接器會使太陽光電組串電壓加倍嗎？</h3>
<p>不會。正確的並聯接法會讓相同極性的導線處於共同電壓，並在輸出路徑合併電流。仍須在低溫條件下檢查最大電路電壓，且輸出分支、電纜、端子和設備的額定值，都必須符合合併電流及實際直流電壓。</p>
<h3 id="does-every-parallel-string-need-a-fuse">每條並聯組串都需要保險絲嗎？</h3>
<p>不一定，而且分支連接器無法回答這個問題。保護需求取決於並聯電源的數量和特性、可能的逆向電流、模組限制、電纜載流量、連接器與設備額定值、適用的陣列標準、設備說明及當地電氣規定。任何 OCPD 的需求和位置都應記錄在案。</p>
<h3 id="can-i-disconnect-a-branch-connector-while-the-pv-strings-are-producing-current">太陽光電組串仍在產生電流時，可以拔開分支連接器嗎？</h3>
<p>不可將不具分斷能力的連接器當作帶載裝置使用。請遵循系統隔離及電氣安全作業程序，操作指定的隔離裝置，並在解鎖前確認所需狀態。使用指定的解鎖工具，切勿以交流側開關作為陽光照射下直流組串的斷電依據。</p>
<h3 id="how-do-i-calculate-current-in-an-mc4-branch-output">如何計算 MC4 分支輸出端的電流？</h3>
<p>將所有接入該輸出端的組串設計電流相加，再依適用太陽光電陣列方法及安裝條件進行必要調整。將所得負荷與分支連接器、輸出電纜、下游端子、保護裝置、隔離開關及設備輸入端比較。組串並聯時，不要將組串電壓相乘。</p>
<h3 id="sources-and-technical-references">來源與技術參考資料</h3>
<ul>
<li><a href="https://webstore.iec.ch/en/publication/66763">IEC 62852:2014+A1:2020 合併版本 - 太陽光電系統直流應用連接器</a>，查閱日期：2026-09-23。</li>
<li><a href="https://webstore.iec.ch/en/publication/110893">IEC 62548-1:2023+A1:2025 合併版本 - 太陽光電陣列設計要求</a>，查閱日期：2026-09-23。</li>
<li><a href="https://research-hub.nlr.gov/en/publications/standardized-nomenclature-for-photovoltaic-connectors-article-no-/">National Laboratory of the Rockies - 太陽光電連接器標準化命名</a>，查閱日期：2026-09-23。</li>
<li><a href="https://research-hub.nlr.gov/en/publications/creating-a-universal-pv-plug-and-socket-standard/">National Laboratory of the Rockies - 建立通用太陽光電插頭與插座標準</a>，查閱日期：2026-09-23。</li>
<li><a href="https://research-hub.nlr.gov/en/publications/photovoltaic-cable-connectors-a-comparative-assessment-of-the-pre/">National Laboratory of the Rockies - 太陽光電電纜連接器：產業現況比較評估</a>，查閱日期：2026-09-23。</li>
<li><a href="https://www.nfpa.org/codes-and-standards/nfpa-70-standard-for-electrical-installations/70">NFPA - NFPA 70 國家電氣法規</a>，查閱日期：2026-09-23。</li>
</ul>